Day 6 of my time shooting with and evaluating the Nikon D610, and it's time to play with softboxes, or more specifically, 1 softbox. Today I'm going to be doing a product shoot of the Keurig K60 coffee maker.
Plus, I'm going to use continuous lighting instead of a speedlite in a softbox.
The softbox I'm using has 4 sockets for standard household bulbs, and I use daylight balanced CFL bulbs, although you'd be fine with regular old lightbulbs too. I'm using four 23 watt / 100 watt equivalent CFL bulbs in mine, so that gives me the equivalent of 400 watts of light from regular lightbulbs.
4 Socket Softbox with individual switches for each socket
The softbox has individual on/off switches for each of the sockets, which is nice because it allows for more control over the amount of light it puts out, basically giving you 1/4, 1/2, 3/4 and full power.
Softbox on Manfrotto Nano Stand Camera Left, Foamcore on the Right
My set-up is simple. One softbox on a Manfrotto Nano stand camera left, and a piece of white foam core to act as a reflector for fill camera right.
I'm not shooting with a tripod as I want to be able to move around and see how the play of light looks in the shot, both as I change my position with the D610, as well as moving the softbox position, direction, and angle.
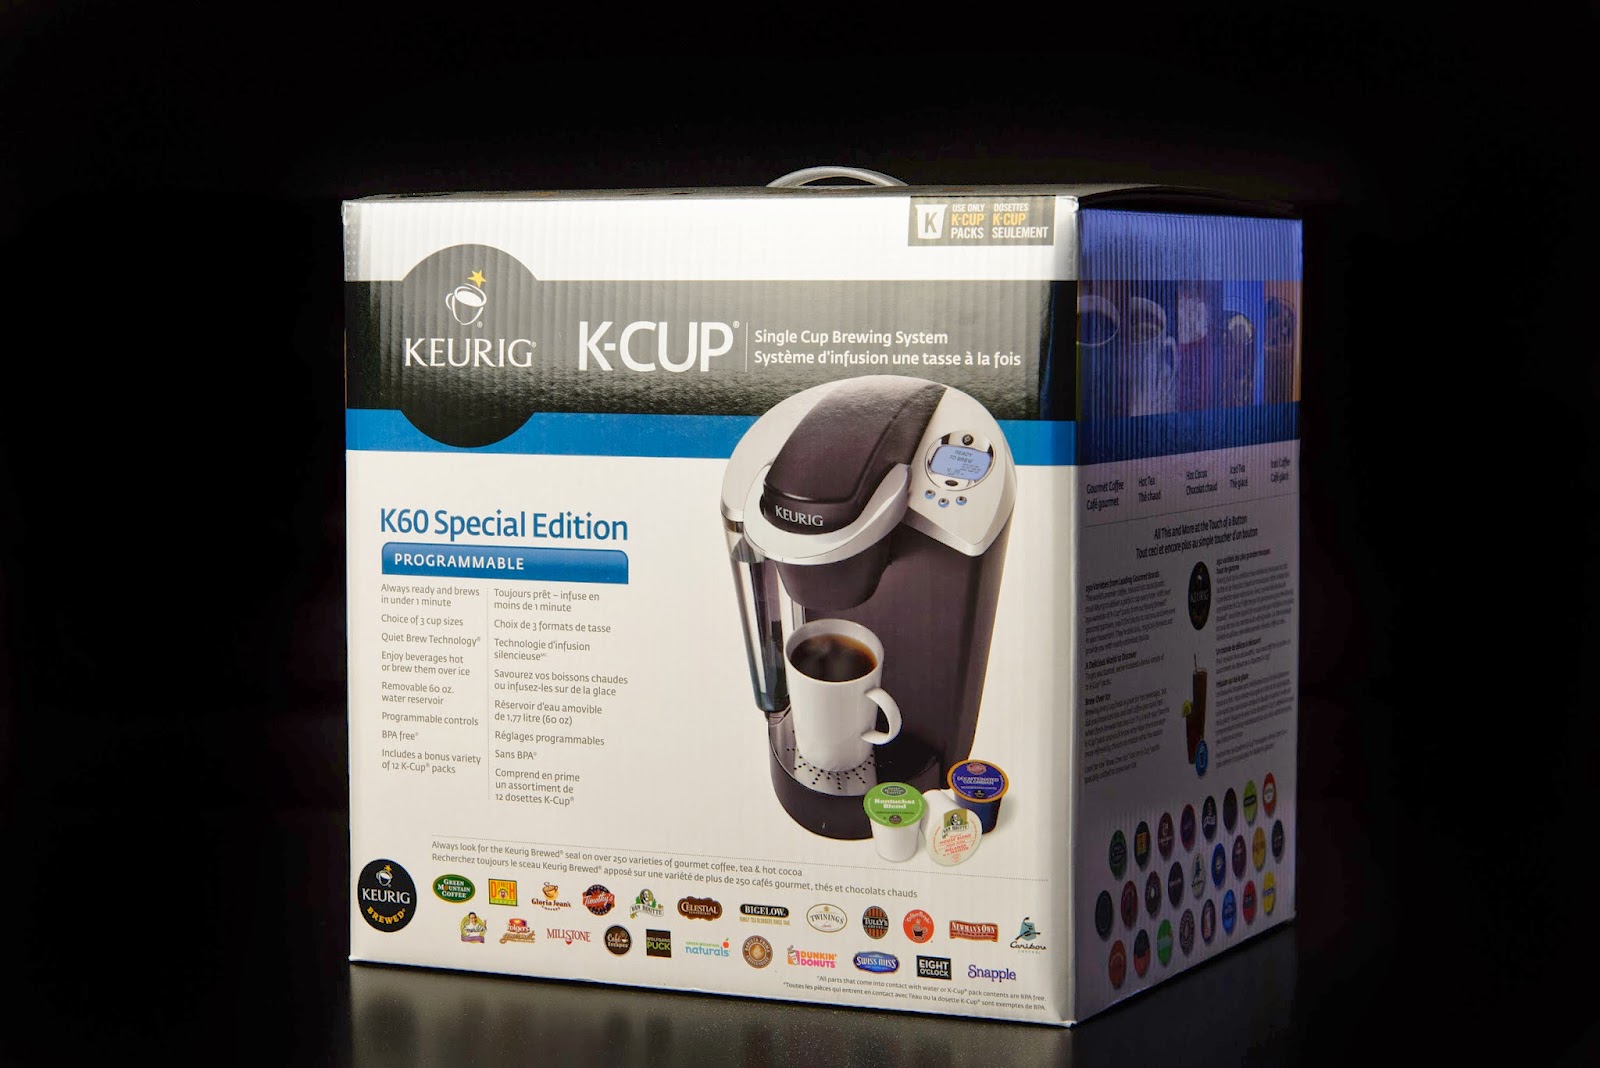
Keurig K60 Special Edition in the box - Nikon D610 1/60s f8 ISO 800
I started with a shot of the Keurig in the box, and this was actually one of the most challenging to do due the highly reflective nature of the glossy box.
Next up was a shot of the welcome package, basically a bright yellow folder that held the manual, warranty, and other paperwork. The bright yellow made for a nice contrast against the black background.
Keurig packaging inside the box - Nikon D610 1/60s f8 ISO 800
This shot shows the internal packaging around the Keurig K60 inside the box. Note that the background hasn't gone completely black, and you can make out my couch and living room. A little burning in PS would take this out, but I left it in to illustrate that the aperture should've been higher to make the back-ground completely black. I should also note that this can be a limitation of this kind of softbox lighting as it is not as powerful as a speedlite in a softbox.
Nikon D610 1/45s f8 ISO 800
The nice thing about a continuous light, is that you can see where the light falls and the reflections it creates as you move the softbox and/or your subject around.
Nikon D610 1/45s f8 ISO 800
As I shot the Keurig from different angles and perspectives, I just kept watching to see how the light played off it in the shot.
Nikon D610 1/45s f8 ISO 800
The shot above is one of my favorites. I just seemed to be able to get the lighting bang on for this one. :-)
Nikon D610 1/30s f8 ISO 800
Notice you can see the background peeking in again. A higher f stop would've pushed this to black, but then you'd need more power out of your lights.
Nikon D610 1/90s f8 ISO 800
Nikon D610 1/125s f8 ISO 800
Nikon D610 1/90s f8 ISO 800
I like Keurig's choice of the bright yellow for their documents package. Made for a nice contrast with the dark colors of the background and the Keurig itself.
Nikon D610 1/30s f8 ISO 800
Nikon D610 1/60s f8 ISO 800
Back side of the Keurig K60 with the power cord at the bottom.
Changed mugs for the fun of it (and also because I'm a Pink Floyd fan). You can get a Pink Floyd "Hammers" mug just like mine on Amazon here.
Nikon D610 1/30s f8 ISO 800
The Nikon D610 performed admirably for this product photography shoot of the Keurig K60 Coffee Maker. I continue to be impressed by it's performance, and the incredibly excellent quality of image files it produces.
Description: Nikon D610 Review: Day 6 - Keurig: Shooting the World's MOST Popular Coffee Maker (Product Photography with a Single Softbox)
Rating: 3.5
Reviewer: LAMPSOLS
ItemReviewed: Nikon D610 Review: Day 6 - Keurig: Shooting the World's MOST Popular Coffee Maker (Product Photography with a Single Softbox)
Day 3 with the Nikon D610 and I’m thinking it’s time to shake it up a bit. I was going to grab a couple of speedlite softboxes, but then I saw my gridspots lying there and thought it would be fun to play with them.
And, it just so happened the Mrs. had my cordless drill and a couple of other tools lying around after assembling a dresser from Ikea, which gave me an idea. Why not do some shots with the tools using hard lighting from the grid spots on a couple of speedlites?
Let’s have a look at the set-up. (click on any of the photos to see larger version)
Nothing fancy here. I just cleared off my coffee table, moved it away from the couch for some seperation, and started playing.
Camera left, I've got a speedlite with a grid spot on it atop a Manfrotto Nano stand.
Camera right, there's another speedlite firing into a piece of foam core that I'm using as a reflector.
Here's a close-up of the speedlite with the gridspot attached via velcro strap. You can see the wireless receiver between the speedlite and the light stand mount.
Here's another angle showing the gridspot more from the front.
And here you can see the speedlite camera right pointed at the foam core. The speedlite is sitting atop a wireless receiver sitting in a speedlite foot stand.
***Side note: Please don't tell my wife I'm showing you messy photos of our living room :-) ***
This shot is pretty much straight on, and you can see it's a little two dimensional. Probably should've angled the drill a little more for a little more depth of perspective. Still, not bad.
The reflections on the surface of my black coffee table make for a nice effect too.
As far as positioning and lighting details, I'm basically just moving the two speedlites around a bit, as well as repositioning the tools until I get the light and the reflections to look how I want them in the photo.
Power settings on the speedlites haven't changed through-out the shoot as I recall. I pretty much set the speedlite camera left to 1/4 power and the speedlite camera right to 1/8th if memory serves, and then just backed them in and out to finess as required.
The nice thing about using a grid spot on a speedlite is that you get a pretty controlled, focused beam of light that allows you to control where the light is hitting your subject.
If you haven't played around with grid spots on your speedlites, I heartily recommend you give it a try. You can get some pretty nice effects from them, and it's just plain fun!
The Nikon D610 performed admirably in this type of studio style shoot, as did the 24-85mm kit lens. In fact, I think the the D610 is well suited as a studio camera. With it's rich, full-frame, 24 megapixel sensor, it delivers very detailed, very nice images with plenty of latitude for post-processing.
Posted by LAMPSOLS
Posted on 4:20 PM
with No comments
The version of Sony's RX100 camera, the II or M2 depending upon which Sony literature you are reading, boasts an increased ISO range up to 12,800 from 6400 in the prior model. That is a lot to expect from a camera with a 1" sensor. So naturally I wanted to see for myself just how high I could take it and still satisfy my own needs and standards.
The RX100 II set to an ISO of 12,800 took a portrait of itself in the reverse mirror of a medicine cabinet by using its 10 second delay. The grain effect is noise that was greatly exaggerated by cropping and then using the extreme contrast of a curves layer in Photoshop.
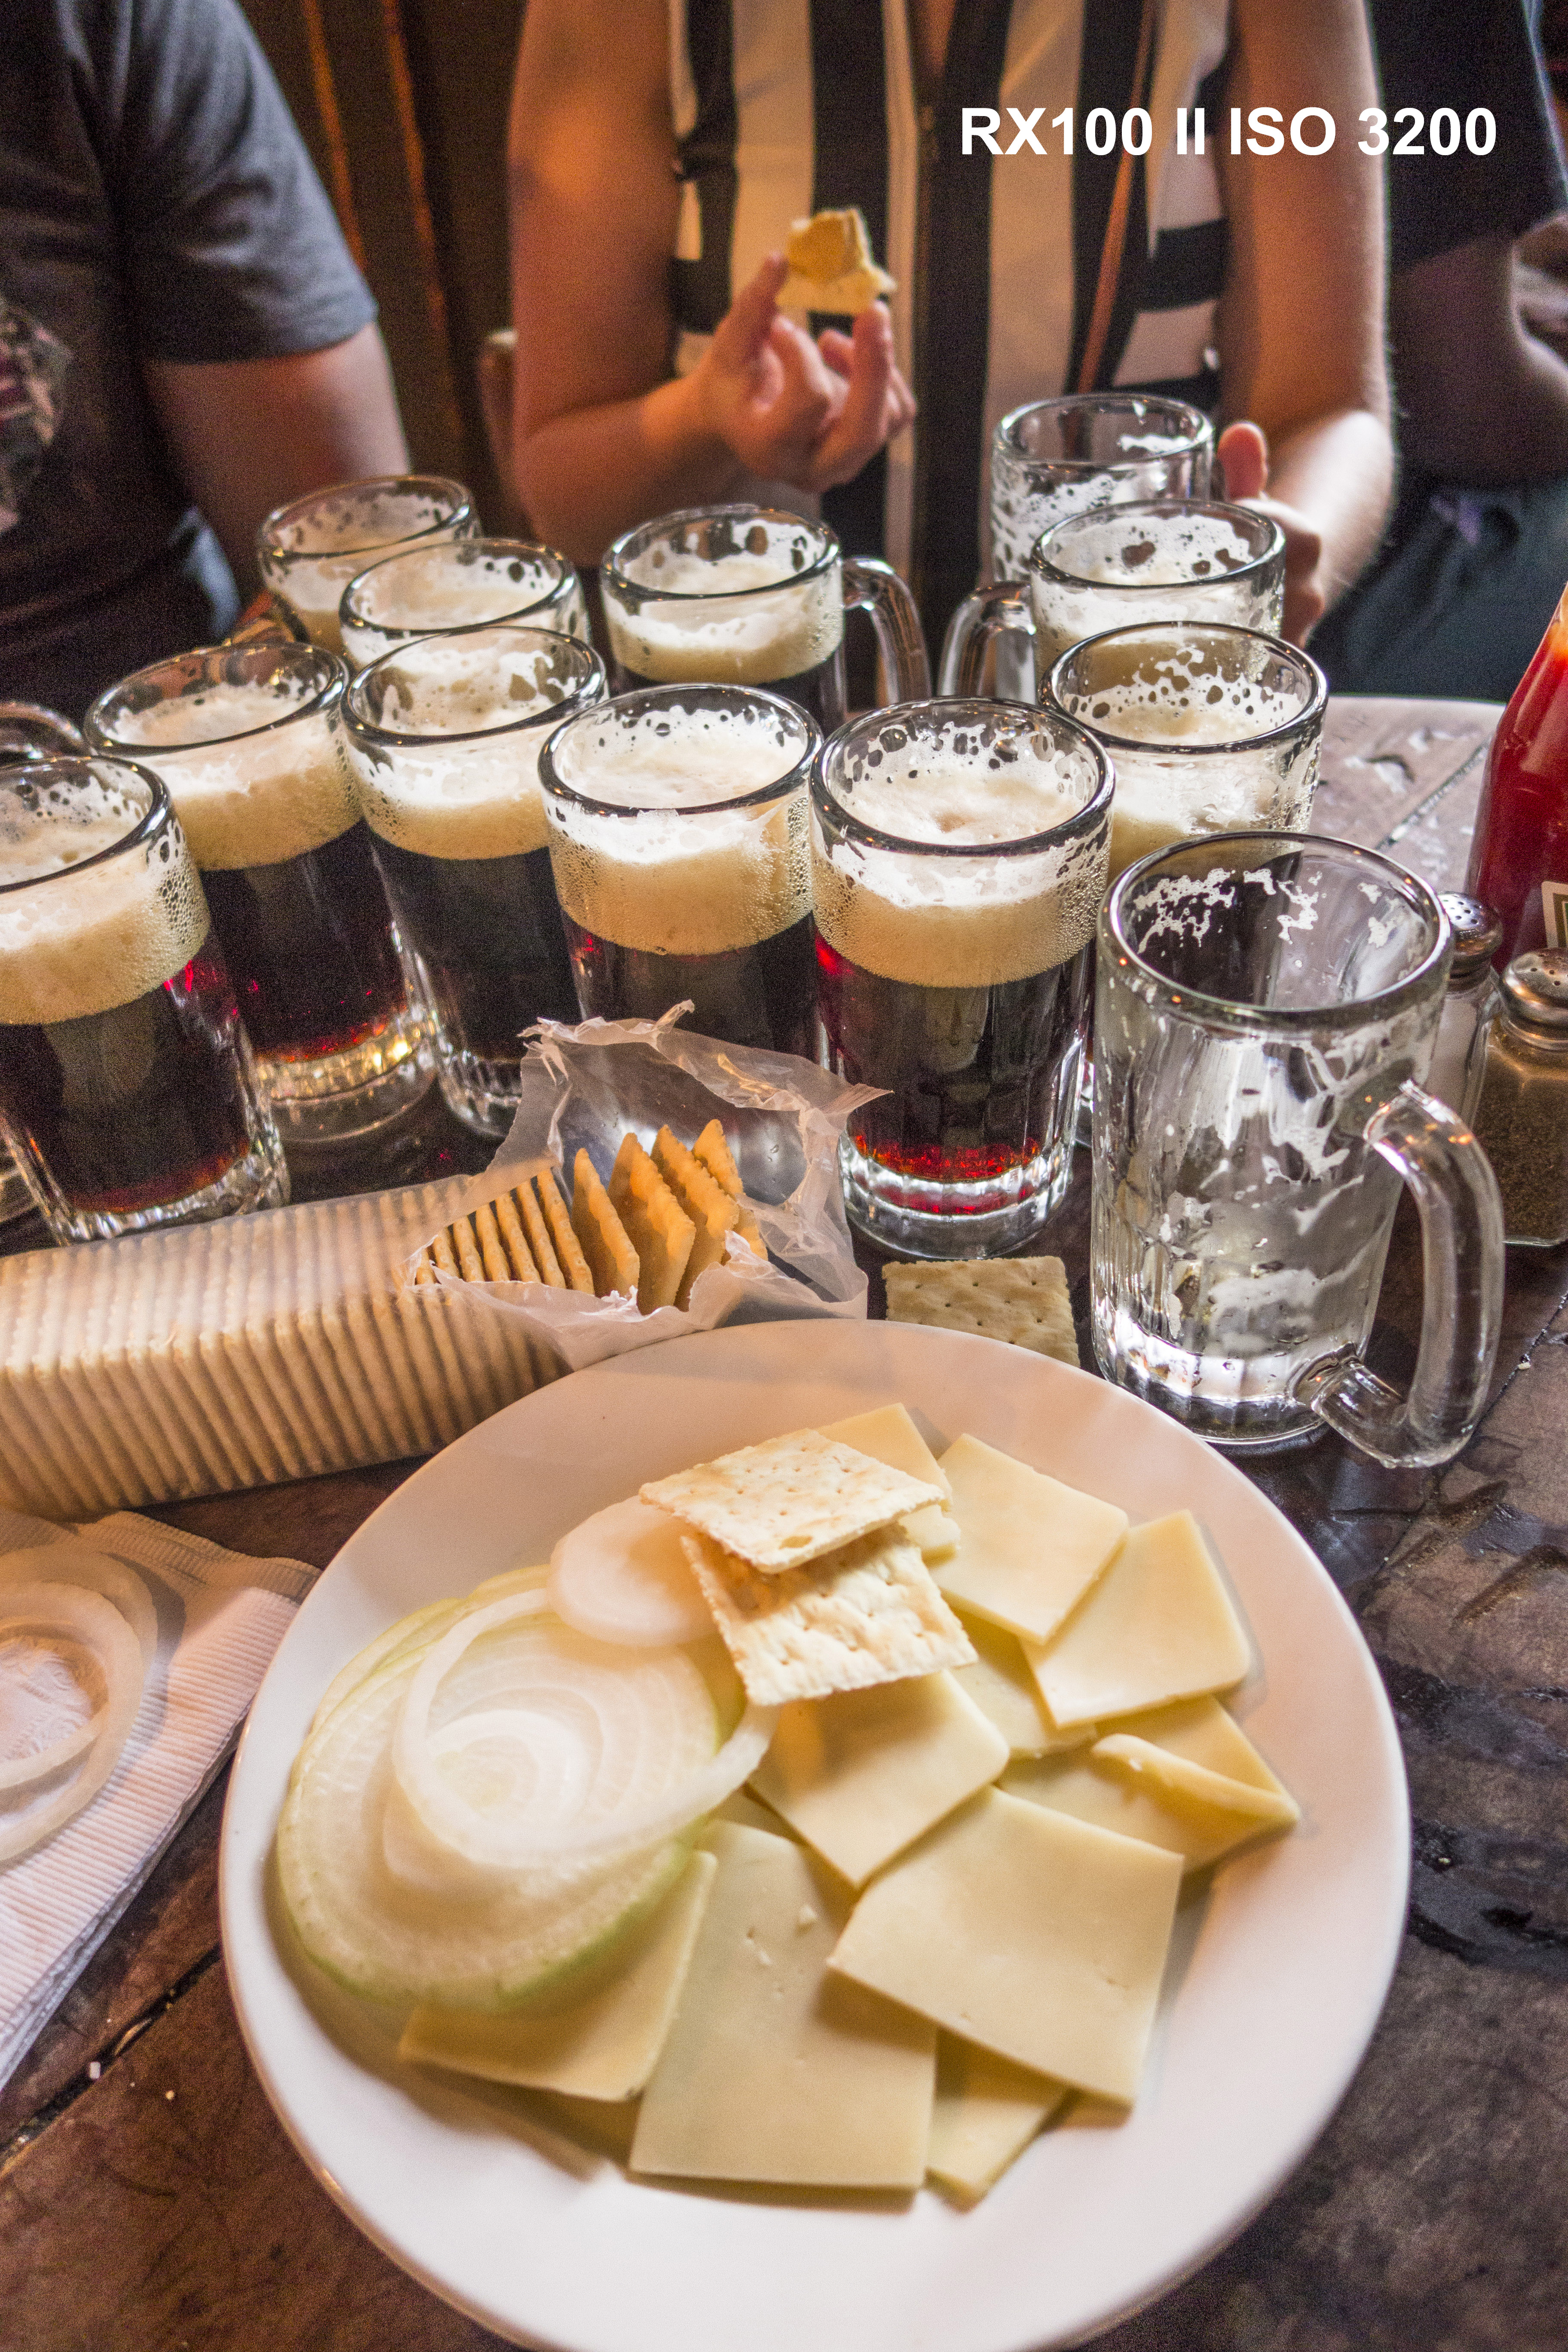
Shooting at a high ISO levels usually coincides with lighting circumstances having very high contrast and deep shadows with little or no detail, and this tends to exaggerate the effects of noise even more than an evenly lit scene would. The photo below was taken in just such a poorly lit scene, a dimly lit bar with mixed and contrasty light. The RX100 was set to ISO 3200. You can download a full res version of the photo by clicking here. The dark area of the beers were in the deepest shadows and were brightened up in post-processing. Doing this is essentially the same as having shot that area at a higher ISO to begin with, and consequently causes much more exaggerated noise to occur there.
For the purposes of this demonstration I did not use any noise reduction in post-processing. Had I done so, I could have reduced the noise to acceptable levels in photos shot atISO 3200 and below. Above that level, artfacting occurs that is difficult to correct without loss of detail.
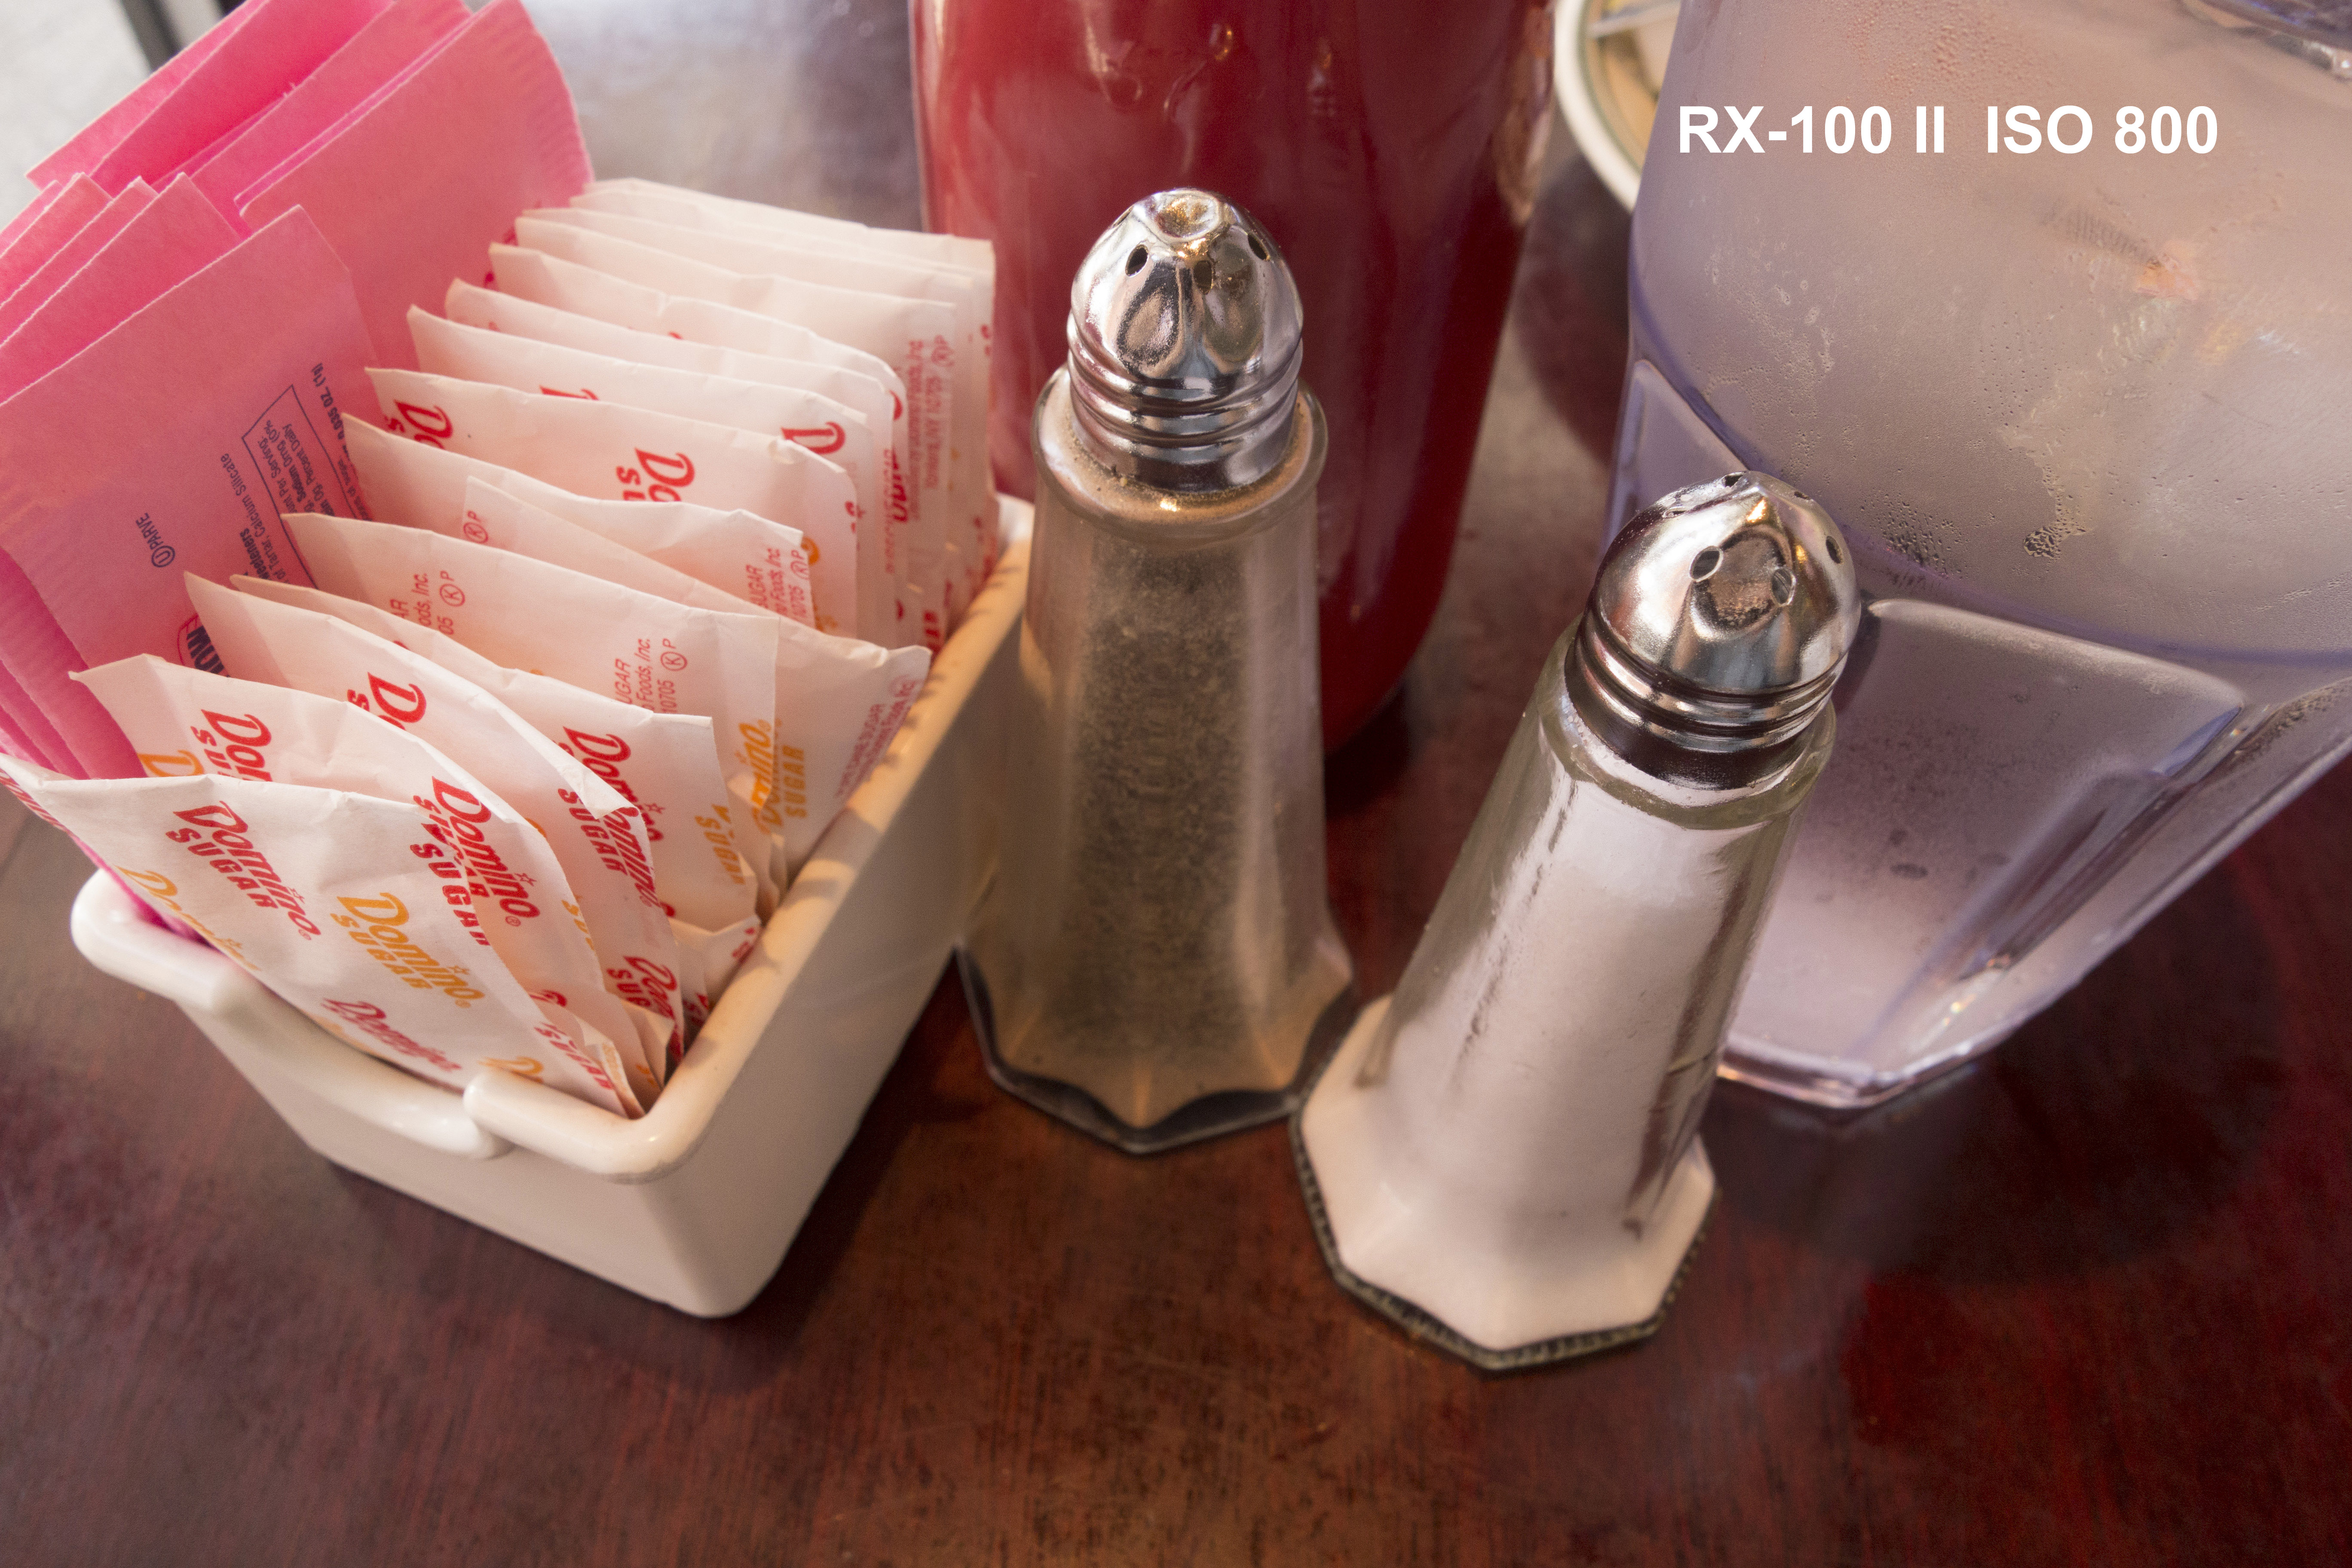
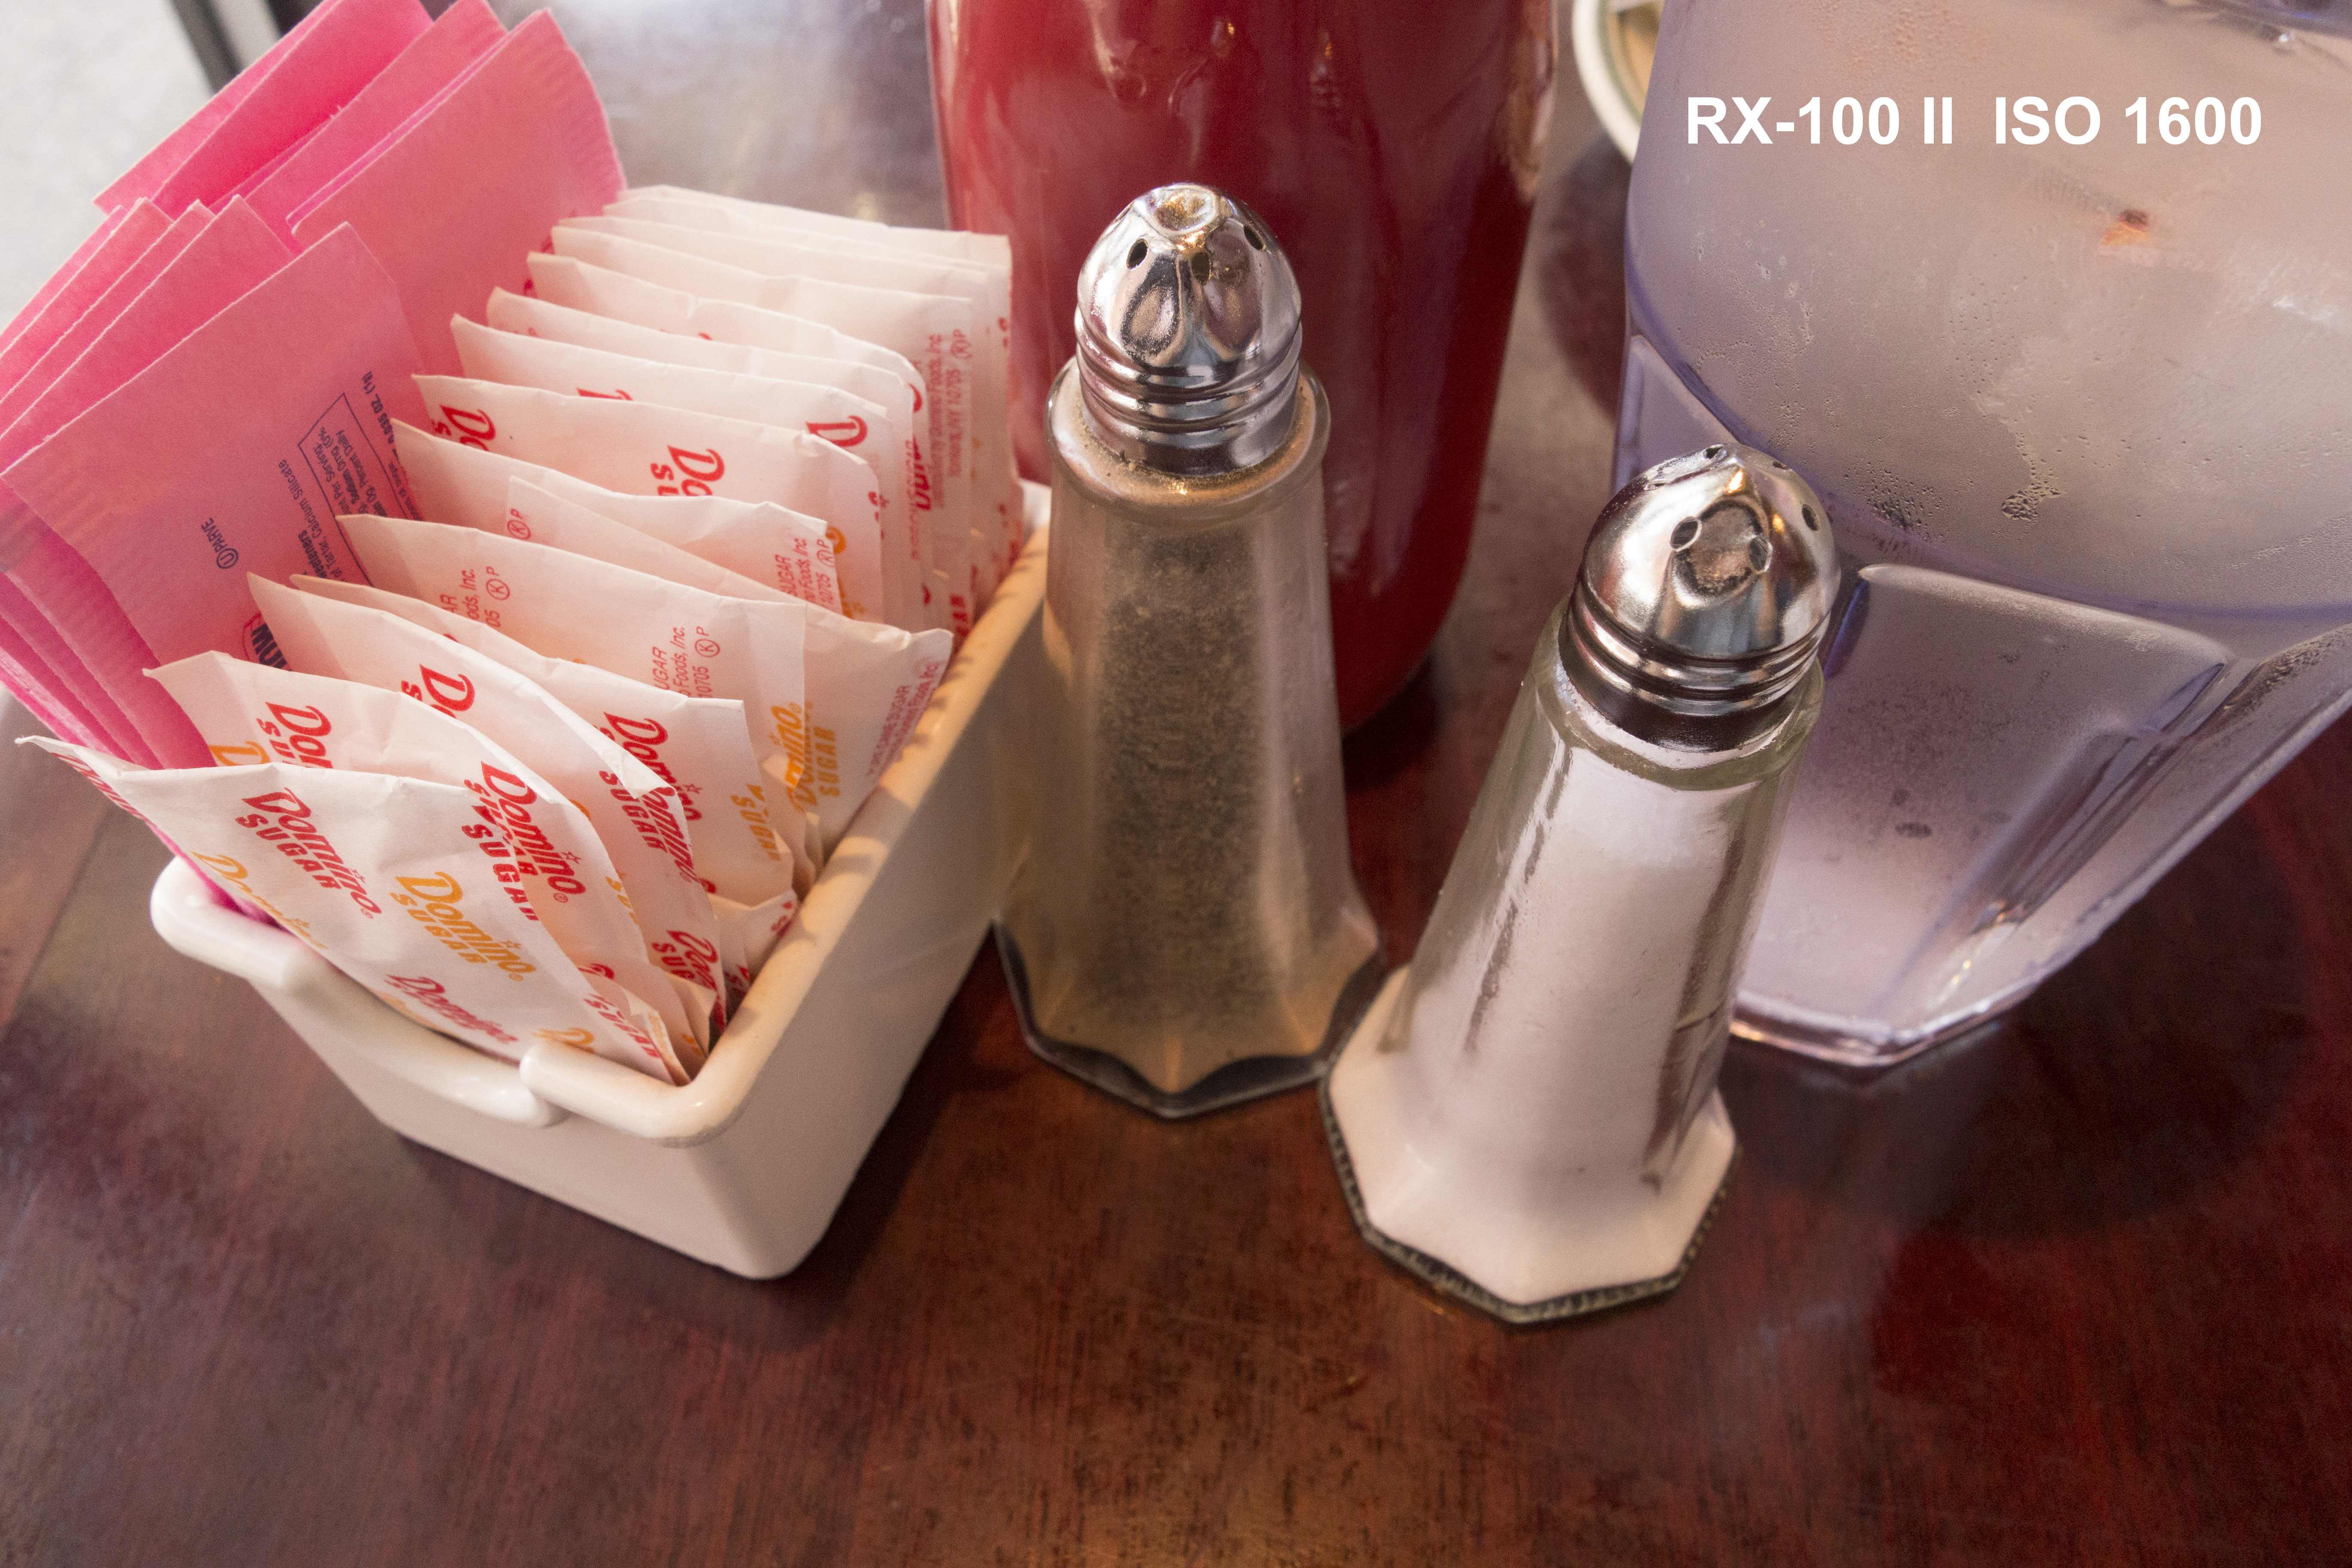
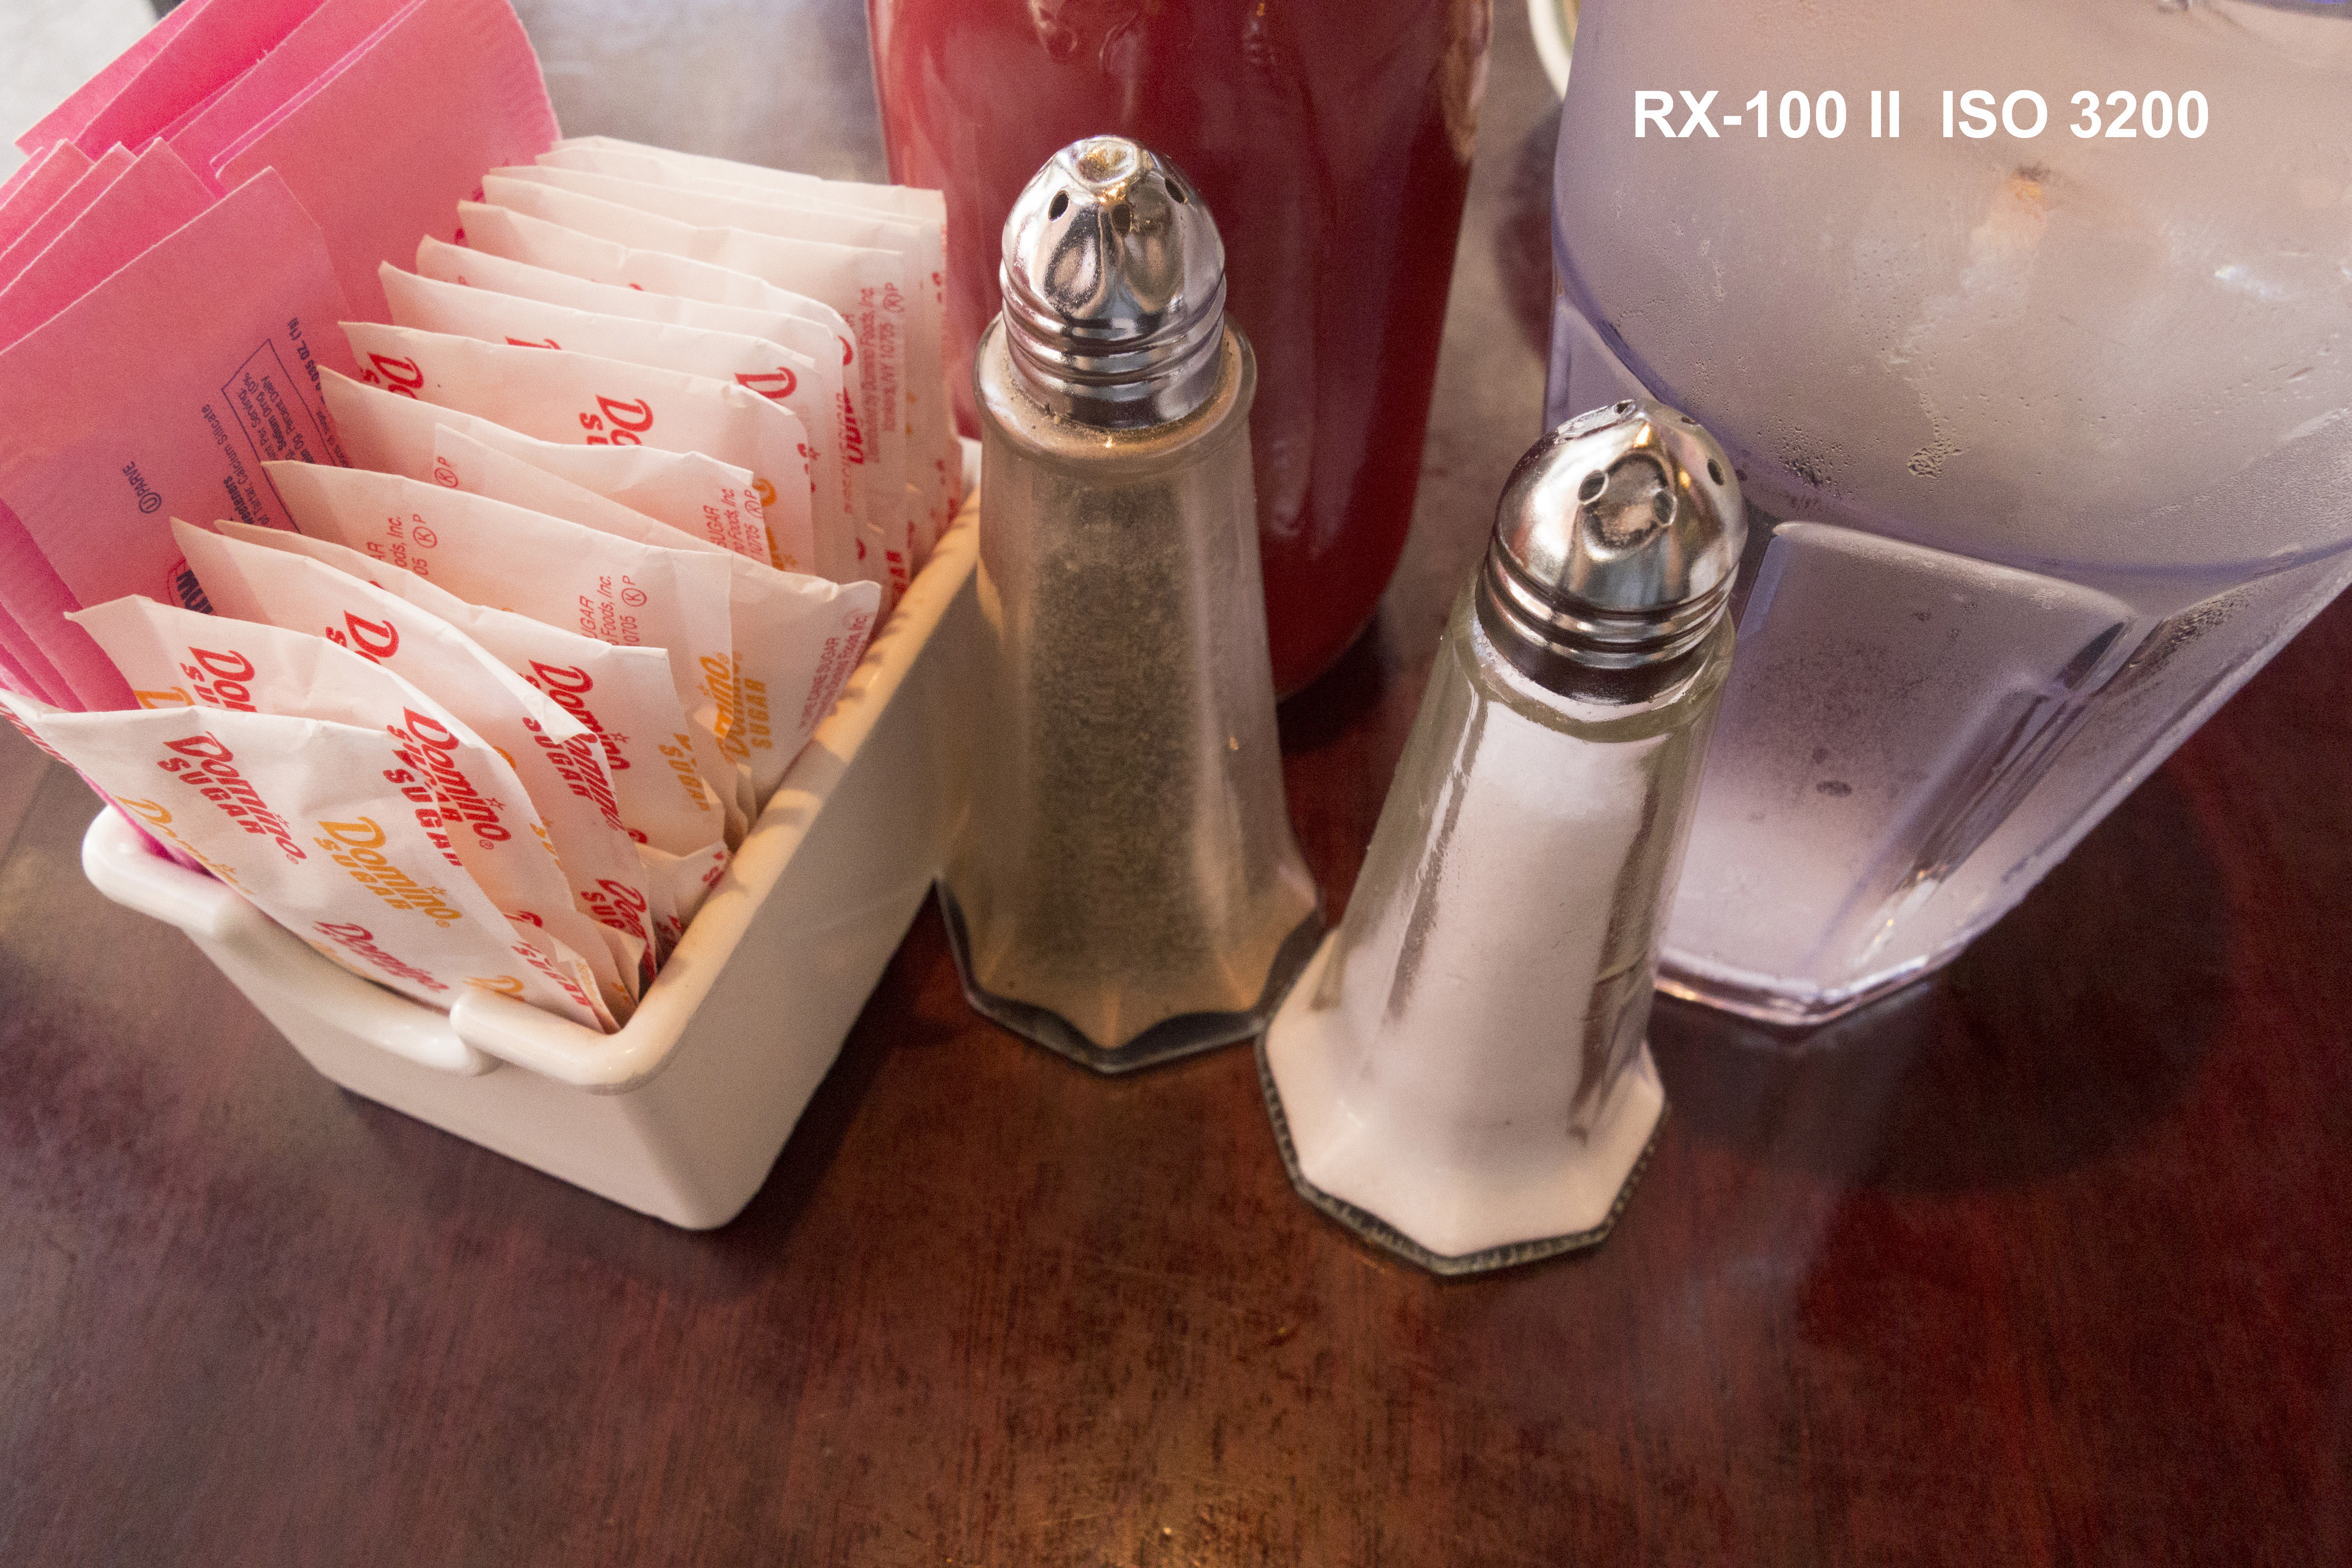
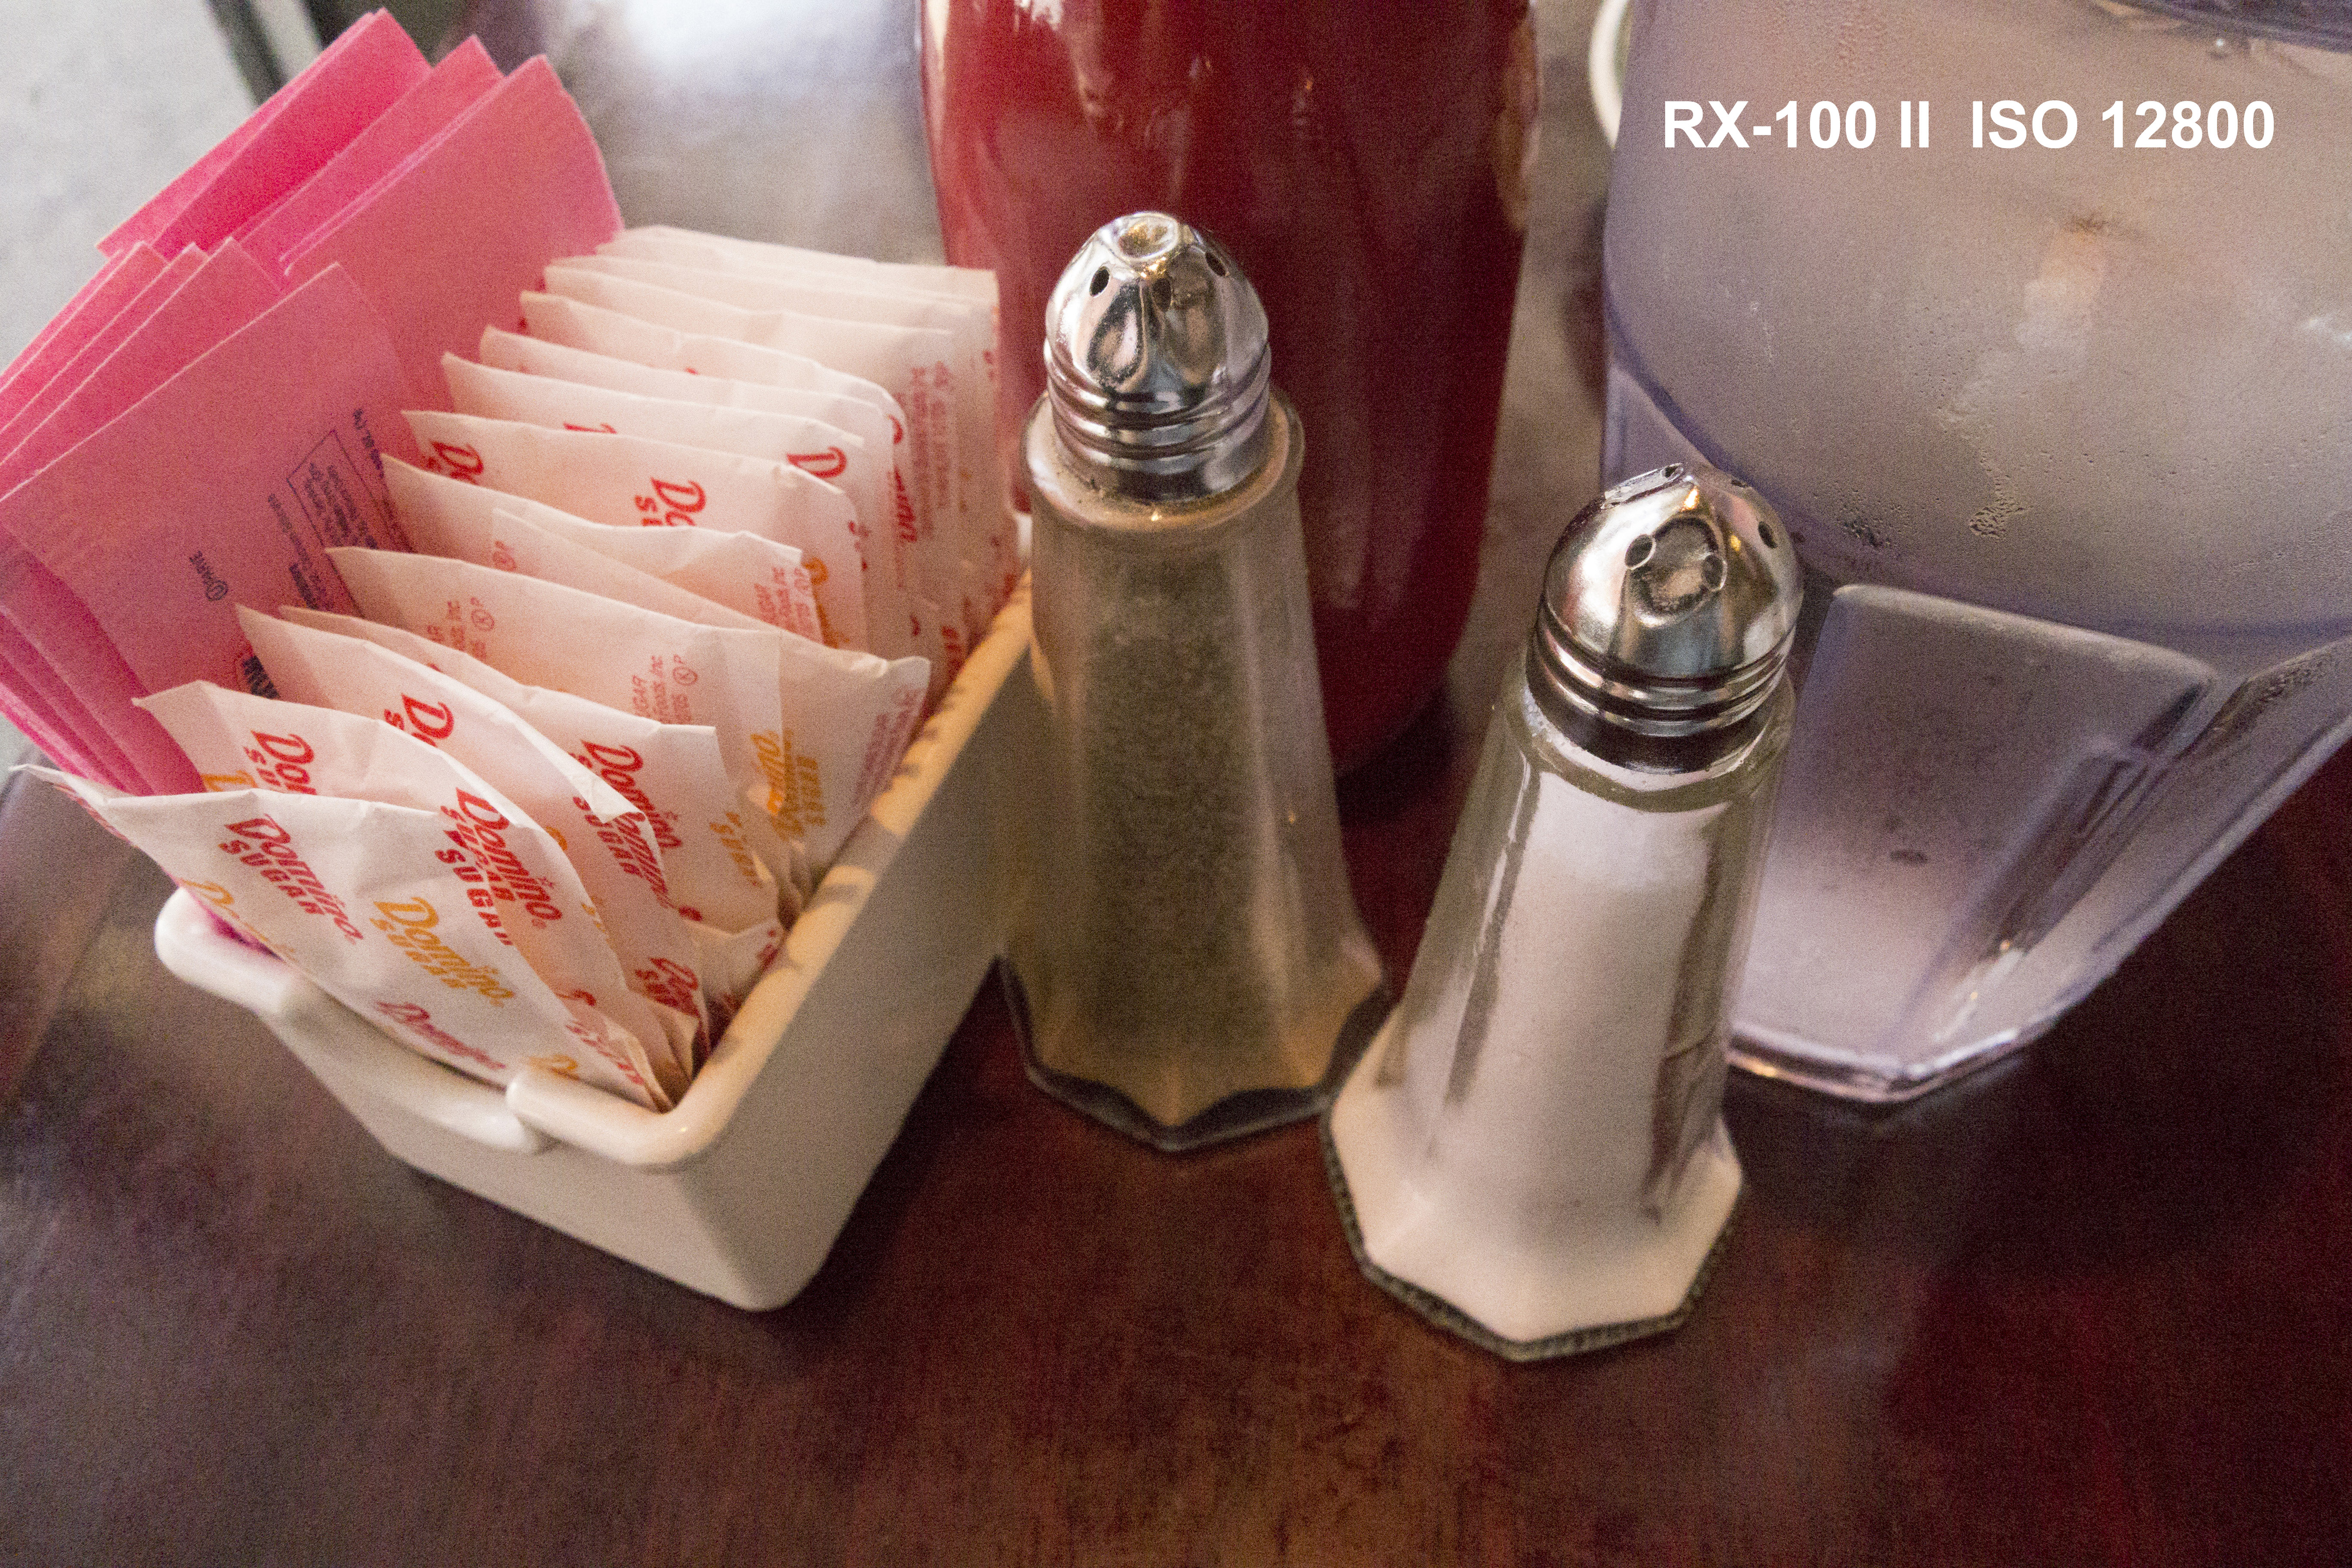
The test photos below were taken at ISO's ranging from 400 to 12,800. I did not feel the need to go below ISO 400 because no noise was apparent below that level. In fact, using the camera in an ISO range of 100-400 produces the highest quality with no visible noise needing correction. Once you hit ISO 800 and beyond, however, noise begins to creep in and will require some reduction when using the image at larger sizes.
Also note that in the situation below, although I used ISO's up to 12,800, this scene did not demand it because it had much more ambient light available than the bar scene above. Nonetheless, downloading the hi res version of the various sample images will provide a good example of what you can expect noise to look like at the various ISO setting of this camera.
The ISO test was done from ISO 400-12,800 of the scene above. Download the hi res samples by clicking on the links below.
If we compare the ISO levels of the RX100 II to those of a high end full frame camera, it isn't going to look so good. After all, cramming 20.7mp onto a 1" sensor has to have some repercussions in noise levels. But, if we take it for what it is, a small, portable camera, convenient enough to always have with us to grab shots we would otherwise miss, it does an admirable job. And a bit of extra post-processing to deal with noise is a small price to pay for getting what would otherwise be a missed opportunity.
Using the RX100 II up to an ISO level of 1600 should not present any real noise problems that are not easily fixable in post-processing. At ISO 3200 and above some artifacting creeps in that makes the images more problematic, but not impossible, to deal with. Ultimately, the shooting circumstances will determine just how bad the final noise will be. It could become very difficult to correct in dimly lit, contrasty scenes with ISO levels of 3200 and beyond. As a result of my own tests, I will try to keep the maximum ISO level of the RX100 II topping out at 1600 whenever possible. This will be helped by using the f/1.8 aperture the camera has at its widest zoom range.