Sony A7R with Leica M lenses - a hands-on review

Leica owners were immediately excited with the first announcements of a full-frame, small, 36mp, mirrorless camera from Sony with the ability of accepting Leica M lenses. It sounded a bit like a Leica aficionado's holy grail: a high resolution, full frame body with a higher resolution than a Leica M, and costing only a third the price of the Leica M 240 - sounded like a perfect solution for a second, high quality body.

Sony brought the Sony A7R into the world with only two Zeiss prime lenses available for it plus one A7 Sony kit zoom of dubious quality - a very limiting series to say the least. The other Zeiss lenses in the series intended for this camera only begin to become available months from when the camera came out. You can adapt other Sony lenses to the camera, but this is a stop gap measure until the real thing comes along, and most of us do not have the other Sony lenses anyway.

A Sony A7r camera with 36.4MP sensor and mounted with a Leitz 35mm Summilux lens. Around it are some of the lenses used for testing in this blog post, including a 21mm Elmarit, 90mm Elmarit, 28mm Summicron, 50mm Summilux, 135mm APO-Telyt-M, and two Voigtlander super wide lenses, the 12mm (shown above) and 15mm.
You can adapt Leica M lenses, if you have them, using a Leica M to Sony E mount adapter. At $2300 the A7r costs substantially less than a $6950 Leica M 240 camera body, and with 36.4MP sensor thrown in as an added bonus, it has the potential of serving as a second body to a Leica system, or of replacing the expensive Leica all together.  The real question we all had is how well the Leica M lenses will perform on the A7r. The reason for concern is that the Leica M camera firmware coupled with sensor design is configured to work with and correct the known aberrations in its own lenses, whereas the Sony A7r is not. This is not such a big concern in medium to long focal lengths, but can become serious with wide angles. The sensor in the A7r also has micro lenses on it to compensate for the short throw of rangefinder lenses, particularly wide and super wide angle lenses.  This addition may help somewhat with the use of shorter Leica lenses. We shall see later it this helps.

There are a number of M to E adapters available. I tried two and had problems with one of them. Until the A7 series came along, the E-mount was used on smaller APS-C sensor cameras that did not require an opening as large as a full frame camera. One adapter I used, a Voigtlander, had a black ring inside of it that caused vignetting with the M lenses. I ended up using a Metabones M-E adapter, which worked fine with the full range of M lenses I tried.

The real question mark of lens adaptability is with the wide angles, such as the 28mm Summicron mounted above and the 21mm f/2.8 Elmarit-M next to it. 
The A7r has a 36.4MP sensor, and no covering anti-aliasing filter. It is the same sensor used in the Nikon D800E, and, as you would expect, its performance is close to par with that camera. That may be all that is necessary to say about the image quality from the A7r. The performance of the D800 camera is about as good as things get with current digital technology. So not much is left to add about the image quality of the A7r.  It produces, as you would expect, top notch resolution and very good noise control at high ISO levels, although a camera of this type is not typically intended for shooting situations where noise would be an issue. A high resolution camera is generally used for landscape, fashion, and still life advertising photography, and where very large print output is necessary. These are situations that generally require tripods or stobes, and don't require high speed captures. For hand-held, low-light, or fast changing subjects, smaller resolution cameras are a better choice. Nonetheless, I did take an ISO test series of images that can be downloaded below.

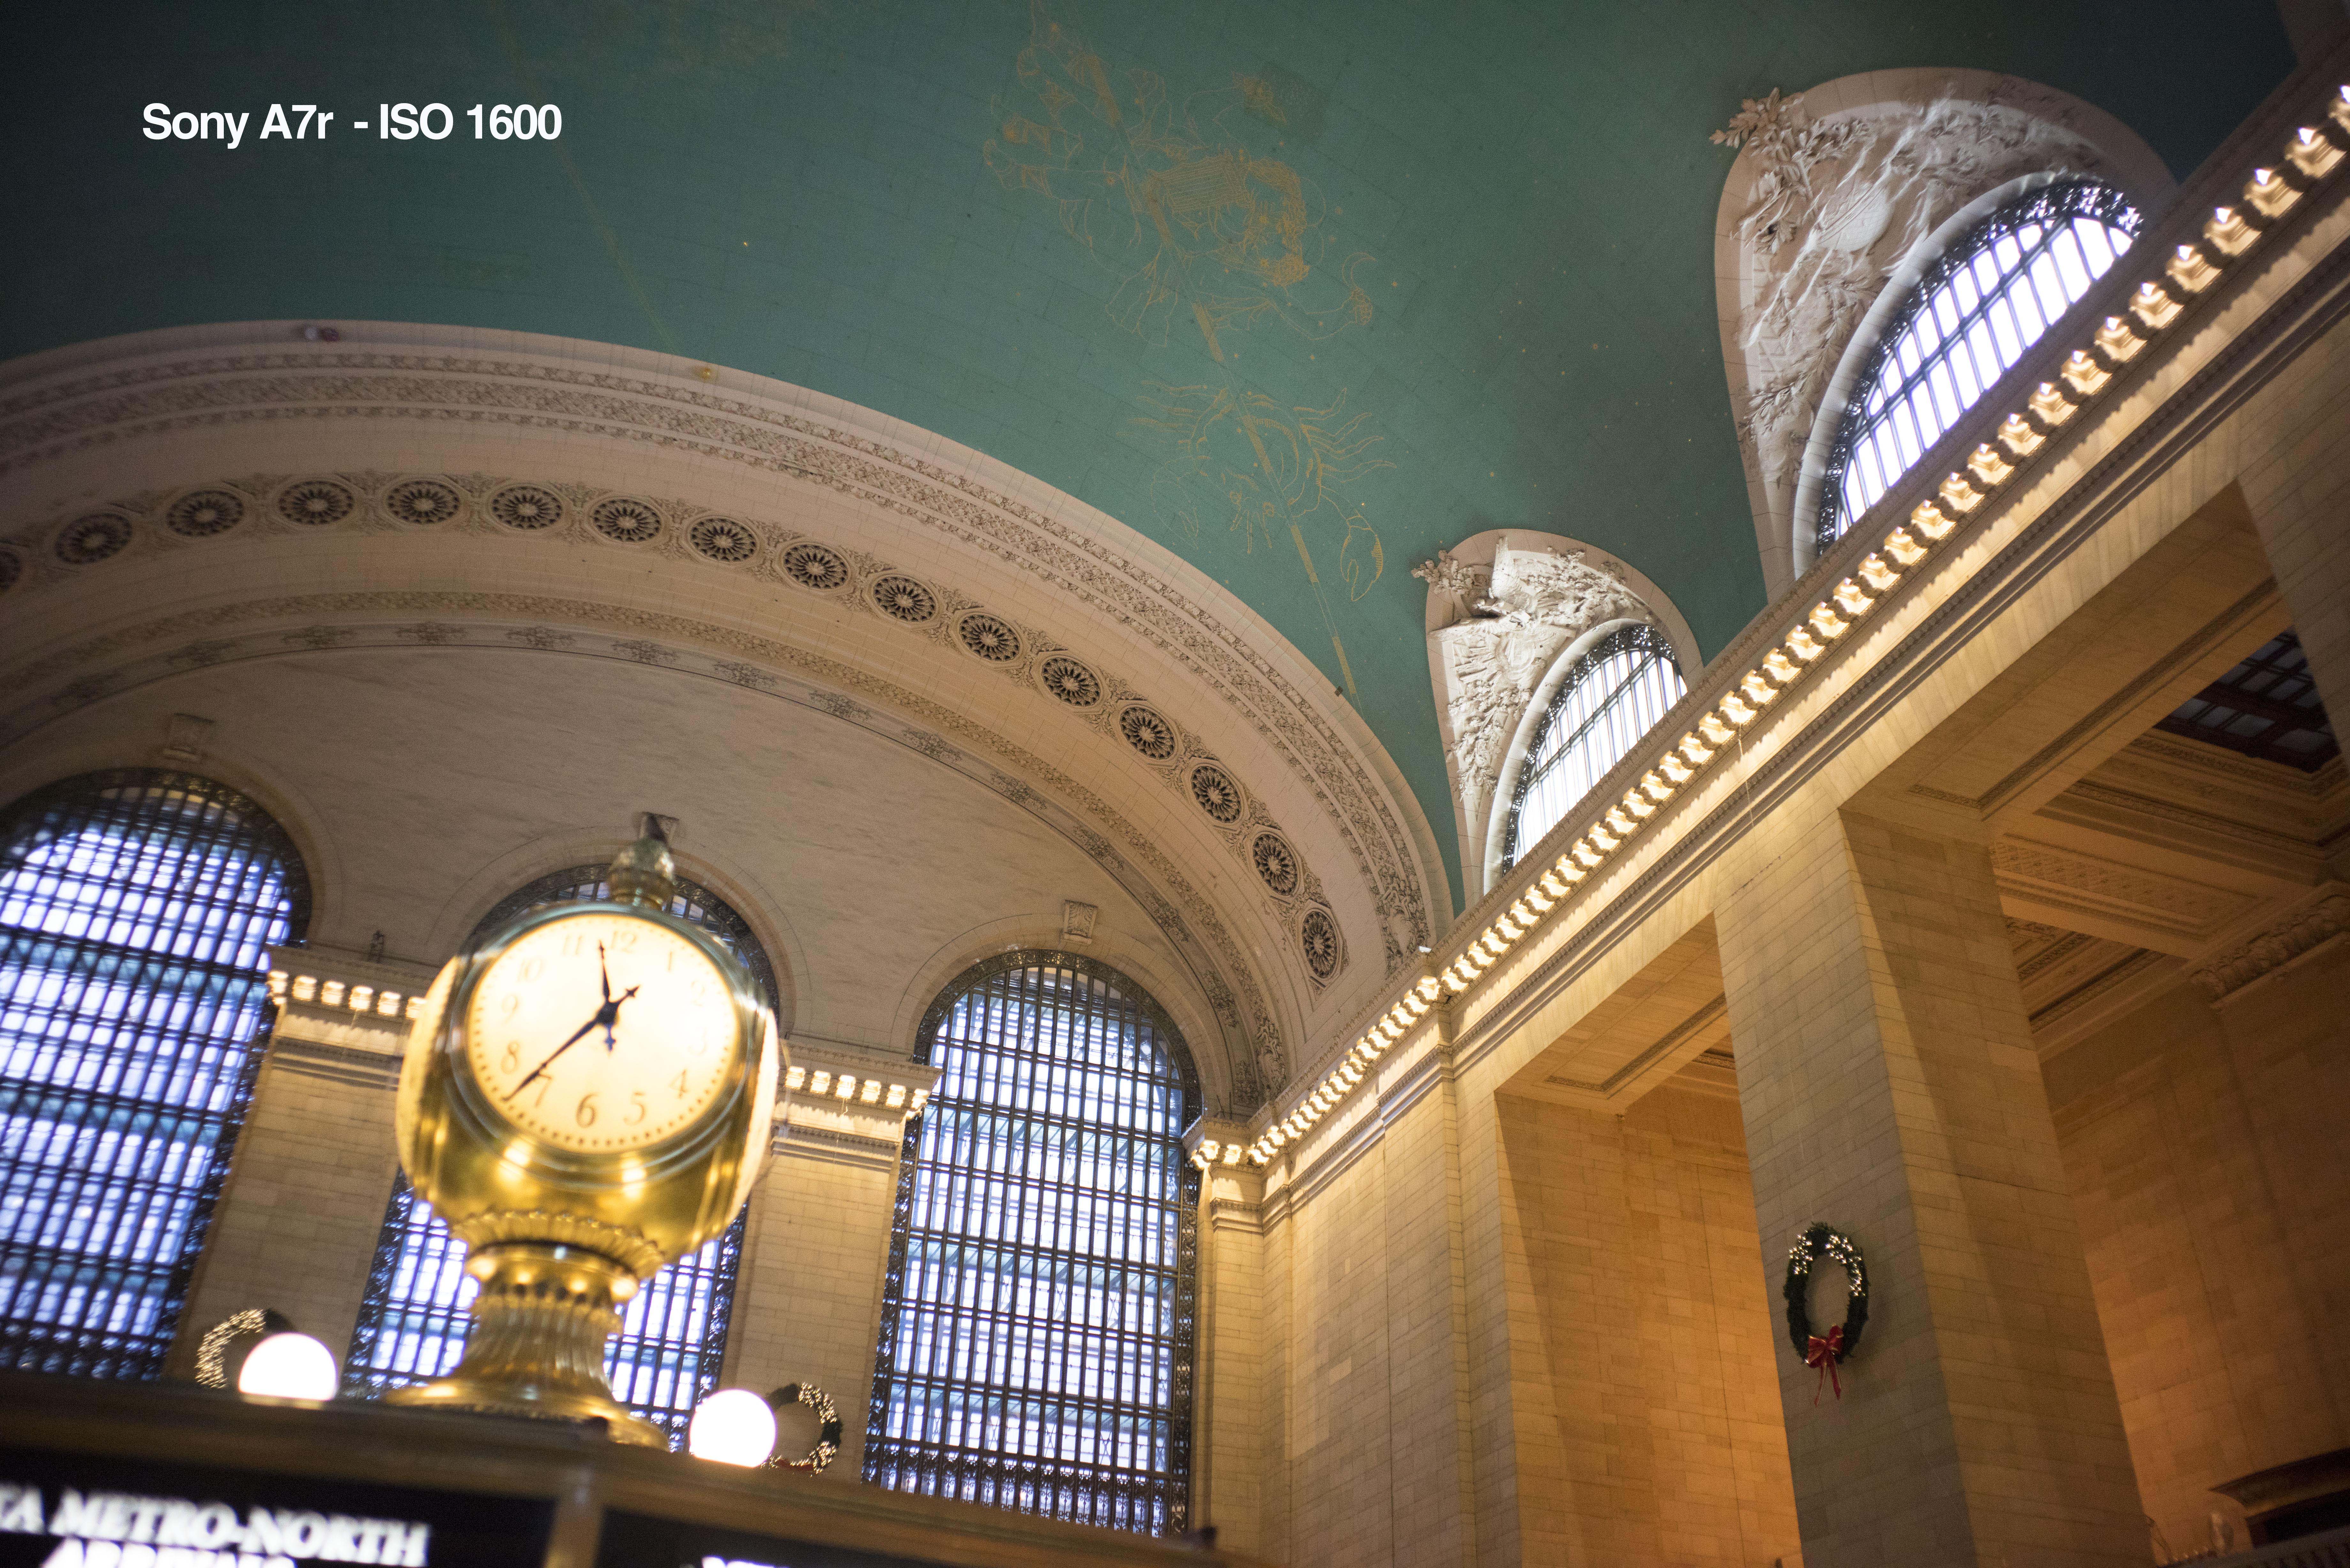
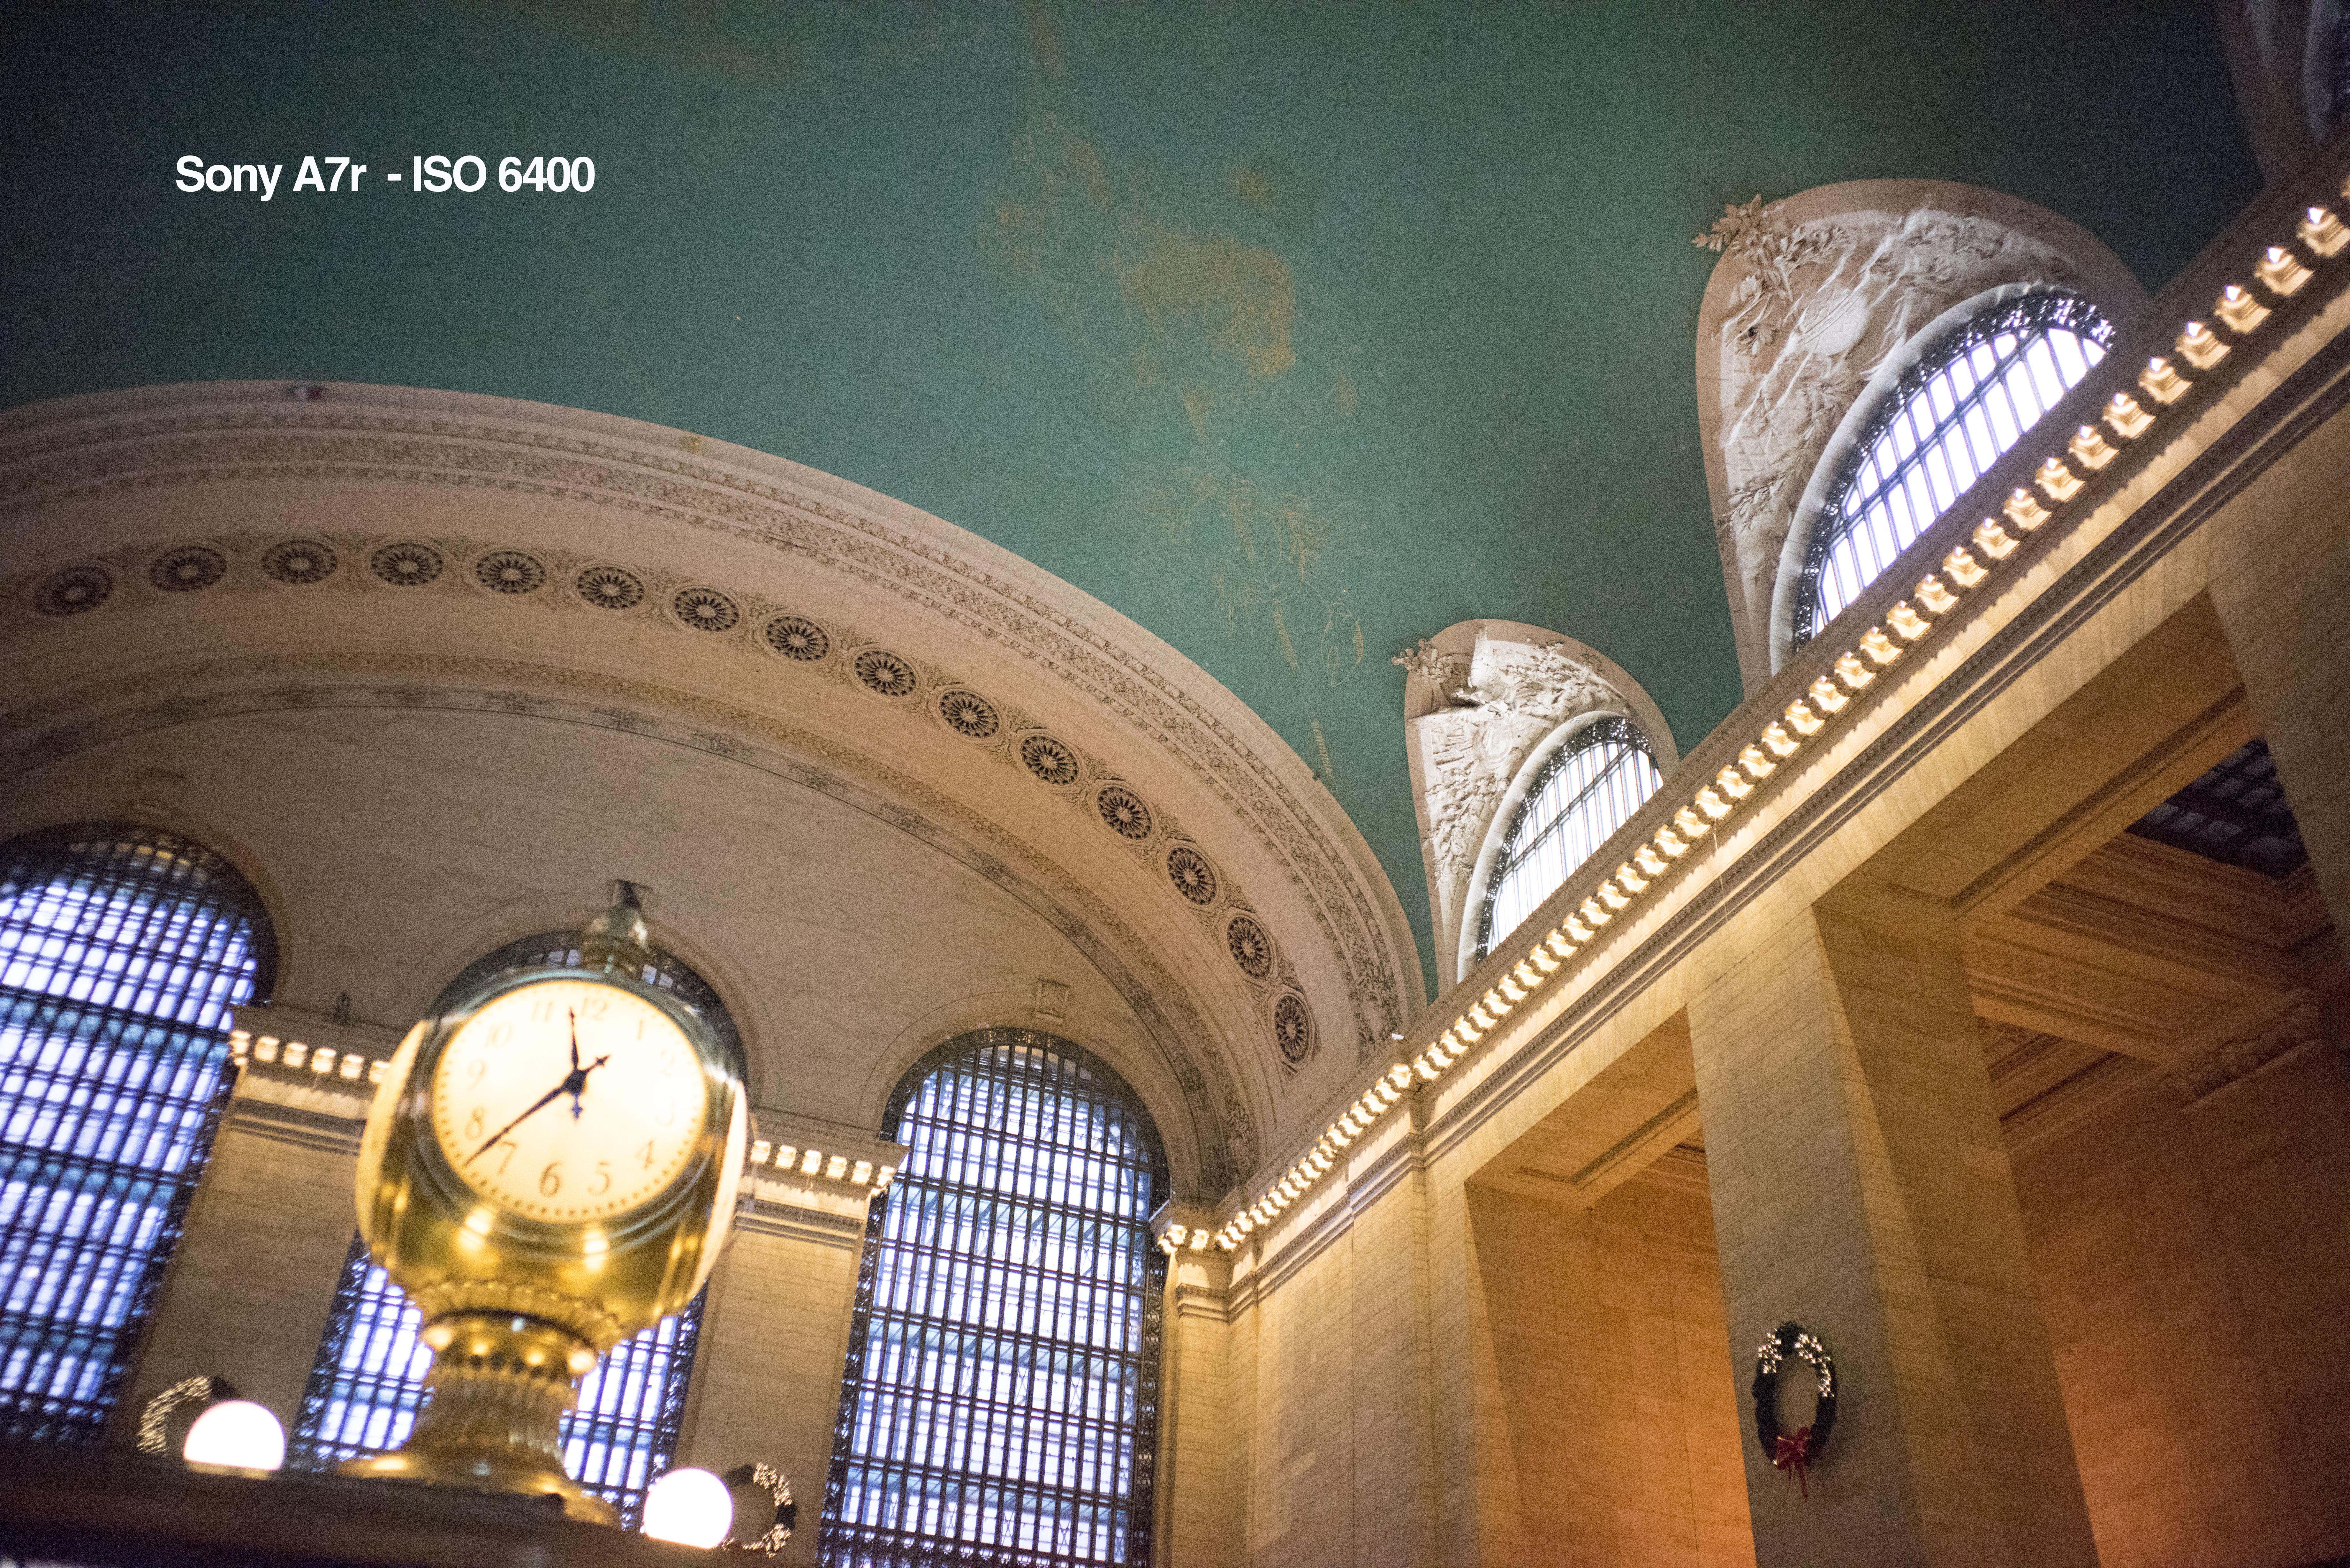
This series of interiors of Grand Central Station was taken with the Leica 28mm Summicron lens. No post-processing was performed on the images. You can readily see the vignetting and color fringing.  Download high res version of the various upper ISO samples with the links below. These files came from a 36MP camera so they are quite large. 

While testing the A7r with Leica lenses I had a Leica M 240 with me also and did some side-by-side comparative shots. For the sample below I used the same 50mm Summicron lens on both cameras.

One of these photos of the Chrysler Building was taken with the A7r, the other with the Leica M 240. You can download a high res version of the comparative set by CLICKING HERE.  They are full res crops of the originals. The photos are not labeled.   The results are given at the very end of this blog post, but first see if you can tell the difference on your own between the 36MP A7r and the 24MP Leica. 
Digital cameras with high megapixel sensors, like the A7r and Nikon D800, also demand good shooting techniques. The whole purpose of using one of these cameras is to achieve optimal image results. To get the most from them means using a tripod almost all the time -- a lesson I learned the hard way shooting out west with a D800 and occasionally not using a tripod on a very sunny day. Even at high shutter speeds with vibration reduction lenses traces of motion blur softened the shots. The A7r is going to be even more demanding because of its light weight. It doesn't have the heftiness often needed to dampen vibration, even when on a tripod. Its small size won't suggest a heavy mount so it might be tempting to lighten your carry load with a lighter tripod. Not a good idea with this camera, if you want to get the most from it. 

This picture of the Flatiron Building was done with the Leica 35mm Summilux lens, an excellent performer on the A7r.

The image below shows uncorrected tests of each of the Leica lenses I used with wide open aperture on the A7r.  Some very obvious correcting is going to have to be done in post processing to fix the vignette and chromatic aberrations. And, yes, the 15mm Voigtlander, as well as the 12mm, really are as bad as they look. Then again their performance on the Leica M 240 isn't much better. These lenses need a program like CornerFix to correct their exposure, severe vignetting, and color distortions.


The chart shows that the middle and long focal length lenses of 35mm and longer need only minimal correction. It is when you hit 28mm and wider that the problems begin. This does not mean that exceptional images are not forthcoming from the A7r with Leica lenses. It does mean that some post-processing will be necessary to massage the images. Longer lenses like the 90mm (not shown) and 135mm need practically no corrections.

Color fringing was evident in pretty much all shots I did with the A7r and Leica lenses, but less so with the longer focal lengths.

This photo was taken with the Leica 90mm Emarit-M lens, one of the better performers on the A7r. This is an unretouched shot, and you can see the typical color fringing that is present on the left, contrasty edges and corners.  Download a full res version of this shot by clicking here.
One thing I noticed immediately about the A7r shutter is its noisy shutter, especially when compared to a Leica or Fuji X camera.   You are not going to be doing any surreptitious shooting with the A7r in quiet environments.  It has a definite double-clicking sound that is sharp and noticeable. The standard A7 has a different, more muffled sounding shutter with a single click that is more like what you would expect.

One of the best performing Leica lenses on the A7r was the Leica 135mm f/3.4 APO-Telyt-M used for the shot above.
Focus peaking, especially when coupled with image magnification, has become a very helpful feature with manual focus lenses. On the A7r it can be set to varying intensities and color preferences. I have grown to really like the feature and found it very accurate on the Leica M 240 and Fuji X cameras.  On the A7r I found the peaking to be too deep to always be accurate, even after making various adjustments to the intensity setting. The peaking would indicate focus, but sometimes it was tack sharp while the very next frame was off just a bit with the result that I lost a disproportionate number of sequential shots.

The A7r auto color interpretation was very good, although I did not have an opportunity to try it out in portraiture.

Two adapters were used to mount this Leica 80-200mm Elmarit --R zoom on the A7r -- a Leica R to Leica M adapter and then the Metabones M to Sony E adapter. This combo was used to take the two night shots below.


Battery life on this camera is the worst I have ever witnessed. Sony does have an add-on battery accessory that will rectify this problem, but that is only negating what the camera set out to be, namely a very compact system. Having to add or carry spare batteries to make up for performance issues is a bit like sweeping dust under the carpet.

Two super-wide angle Voigtlander lenses with Leica M mount, the 12mm on the camera, and 15mm next to it. 
 Frankly, these two super-wide Voigtlander lenses have terrible aberrations on digital cameras, but if you need a 12mm lens, you don't have many other options, and you're going to have to put up with beating the image into submission using considerable post-processing.

Taken with the Voigtlander 15mm f/4.5 lens on the A7r. Heavy vignetting and edge discoloration are a typical characteristic of this lens. As mentioned above, all of this can be corrected by running the image through CornerFix software. 

Same scene as above, but taken with the Leica 21mm f/2.8 Elmarit-M ASPH, one of my favorite super wide angle lenses.  No post-processing was added to the two shots above. Results from the 21mm are very good, especially considering how wide it is. 

Conclusion:

If you are going to be using the A7r with Leica lenses, you should be prepared to compensate for the mis-match by having to perform some post-processing corrections.

This camera is probably going to be better served by its own Zeiss lenses when they become available. Until then, yes, we can adapt Leica M lenses to use on it, and from a point of view of size the fast aperture Leica lenses are more proportionate to the very small camera body. Sony had to make a serious compromise when it tried to have the smallest full frame interchangeable camera body and couple it with modern, auto-focus, stabilized lenses. The Zeiss lenses made for the camera are inherently heavy and bulky.  To keep the size of the lenses to a level where they don't overpower the diminutive A7r body, they were given slow apertures. The two zooms, for instance, are f/4 lenses.

The A7r is a very specialized camera, and I am not sure its formula -- a full frame sensor in such a small camera body -- works. If I really need such high resolution, I feel like I have to pay my dues and go with the  heavier, but more stable (i.e.vibration resistant) Nikon D800. If I want small and compact, I prefer an actual Leica M with its own lenses, or a Fuji X camera with its smaller lenses kit.

The setting sun lit the smoke from behind while the foreground buildings were in deep evening shadow, a difficult situation for any camera. the A7r pulled it off with excellent dynamic range and accurate color rendition and requiring only modest post-processing to balance out the light to dark areas. 
Unless you really, really need the 36.4MP the A7r delivers for making huge prints, the A7 may be a better choice for a small, full frame camera. At 24.5MP is is no slouch. It has a better shutter, faster burst speed (5fps vs 4fps for the A7r), and better auto-focus combining both phase-detection and contrast detection. It is also more forgiving when hand-held.

I am not even sure that full frame and small camera is a viable combination. APS-C sensors have come a long way and are a much better choice for a small camera. Right off the bat, the lenses can be smaller and lighter simply because they don't have to cover so large a sensor area.  A camera like any of the top Fuji X models may be best-of-breed in this genre. Leica works because it comes with a full stable of top notch, tiny lenses -- manual focus, admittedly, but that is how to keep things really compact.

My main purpose in this experiment was to determine if the A7r could serve as a higher resolution substitute, or act as an extra body for a Leica M system. In the end I concluded that the results, while marginally better from the higher res A7r sensor, were not enough for me to use this camera instead of my Leica M 240. The Leica worked better and with considerably less post-processing hassle using its native lenses. This tended to negate any benefits the larger 36MP A7r sensor might have. If it's a less expensive spare body I want, I think I would opt for the features of the A7 over the A7r and save even more.

Pigeon in the snow, Leica 135mm APO-Telyt-M at f/3.4.
In the end I don't think we will really know the full capability and usefulness of the A7r until it has a full complement of its own Zeiss lenses, and that is a long way off. In the meantime other camera manufactures will not be sitting still, which may be one reason why Sony released this camera prematurely relative to its lens system.


Results for the A7r/Leica M comparative test shots of the Chrysler Building: The Leica image is on the left, A7r on the right.


If you are planning on purchasing this camera, you can help support this site at no extra cost to you by purchasing from one of our affiliate sellers listed below and thanks for your support :

- Sony Alpha a7 Mirrorless Digital Camera can be ordered from:  Amazon
- Sony Alpha a7R Mirrorless Digital Camera can be ordered from: Amazon

Free Shipping in US & Low Price On Amazon. For anyone looking for this model??


Description: Sony A7R with Leica M lenses - a hands-on review Rating: 3.5 Reviewer: LAMPSOLS ItemReviewed: Sony A7R with Leica M lenses - a hands-on review

Rainy day in New York with the Sony RX100

It's always nice to have the little Sony RX100 tucked in a pocket. I never know when I'm going to need it. Took these shots with it on my way back from running an errand. I mostly shoot with the RX100 set to square format, which is why I've begun referring to it as my little Hasselblad.


Description: Rainy day in New York with the Sony RX100 Rating: 3.5 Reviewer: LAMPSOLS ItemReviewed: Rainy day in New York with the Sony RX100

Empire State Building at dusk with the Sony A7r and Leica lens

Last night I added some photos to a platinum series I am doing on various subjects. These were taken of the Empire State Building at dusk seen through the branches of winter trees. All were photographed with a 50mm Leitz Summilux mounted on the Sony A7r except for the closest view, which was done with the Leitz 135mm APO-Telyt-M.


Description: Empire State Building at dusk with the Sony A7r and Leica lens Rating: 3.5 Reviewer: LAMPSOLS ItemReviewed: Empire State Building at dusk with the Sony A7r and Leica lens

the Fuji X-E2 vs the Sony A7R - An unfair comparison?

On the face of it, the idea of comparing the results from a smaller APS-C 16mp sensor to those from a larger full frame 36mp sensor is a completely lopsided affair, and something I did not intentionally set out to do it. Quite by accident, while testing the Sony A7R for another blog review I intend to post later this week, I discovered that some images taken by the lower 24mp Leica M 240 were really quite close in quality to the A7R, and this started me wondering about how much of an improvement a high resolution camera like the A7R would be over something like the Fuji X series. So, just for the fun of it, I set up a comparative situation to see how close I could come to the full frame image quality of the Sony A7R while using the smaller sensor of the Fuji X-E2..

fuji x-e2 vs sony a7r, review fuji x-e2 vs sony a7r, review fuji x-e2, review sony a7r

I chose a situation where I could use a reasonably high ISO -- in this case I settled on 1600, although I did the test in a range from 800-6400.  The real problem with comparing two unequal sensor sizes is that the final images are not the same size, but what I wanted to find out was how the images would compare if they were the same size.  This meant I had to either up-res the Fuji image to 36mp or down-res the A7R to 16mp.  I chose to go the high route and make both images 36mp.

My preferred method to up-res an image is to do it in Adobe Bridge where I can utilize the full 16-bit RAW file information in the process. Comparing the two images showed what I expected, namely, that the image from the A7R would naturally show a higher resolution than the one from the X-E2. What surprised me was that it did not show a significant difference in noise between the two at the 1600 ISO.  So my next thought was: Could I perform a gentle massage to the Fuji X-E2 file that would bring it closer to the image quality of the a7R file? For this I went back to Bridge.

fuji x-e2 vs sony a7r, review fuji x-e2 vs sony a7r, review fuji x-e2, review sony a7r
This is the naturally room lit scene setup for the test images. It was photographed with both cameras set to ISO 1600 and f/5.6. You can download the Sony a7R file and the up-res 36mp version of the Fuji X-E2 file with the links below.

In Bridge on the X-E2 RAW file I gently adjusted the sharpening and detail tools until I had a reasonable facsimile to the A7R image. Adding the sharpness, small as it was, increased the contrast and started to lose some of the highlight detail. To fix this I lowered both the highlights and the contrast until it looked right.

For the X-E2 RAW image I set the Resize to fit option to 36.2MP in the "Workflow Options" area of Adobe Bridge. This produced an up-ressed version of the Fuji 16mp file to equal the size of the A7R file.

Sharpening sliders in Adobe Bridge were set to 55 for Amount, and 50 for Detail. Luminance Noise set to 16, and Luminance Detail at 50. 
One difference between the two cameras was their lenses. For the Sony I used the Sony 28-70mm  zoom. This is not a very good lens and contributed some softness to the image. Nonetheless, it is the only native Sony lens available for this camera with a proper focal length for this test. On the Fuji X-E2 I used an equivalent 18-55mm zoom, which is far superior optically to the Sony lens.

Both cameras were on a tripod. For the Fuji I used a standard, screw-in cable release. For the Sony I used a 10 second delay timer because the camera only accepts a proprietary release that I didn't have.

Conclusion:

The purpose of this exercise for me was to see if I could approach a 36mp, full frame image quality of a superb camera sensor like that in the Sony A7R using a Fuji X camera and applying some moderate post-processing techniques. I actually surprised myself with the results. I did not go into this experiment expecting to come as close as I did to equaling out the two images.

There is an old adage that says: "It isn't the camera; it's the photographer."  What I think this experiment illustrates is that proper camera technique and good use of post-processing are as important as the camera itself in producing top notch results.

I also found the X-E2 a far easier camera to use. The Sony A7R has an annoying two-step process for changing the focus point, something that Fuji thankfully corrected with firmware awhile ago. The Fuji menus in general are easier to navigate, and niceties like the good old standard screw-in cable release socket make a photographers job that much easier.

The point of this exercise was not to see if one camera was better than another. Instead, I wanted to see if the Fuji X-E2 with its handicap of smaller sensor and lower megapixels could approach the level of a top full frame model. You can judge the results for yourself by downloading the images above. As far as I am concerned, the Fuji X-E2 came through like a champ.

If you are planning on purchasing this camera, you can help support this site at no extra cost to you by purchasing from one of our affiliate sellers listed below and thanks for your support :

- Sony A7R Camera can be ordered from:  Amazon

- Fujifilm X-E2 Camera can be ordered from:  Amazon  

Free Shipping in US & Low Price On Amazon. For anyone looking for this model??


Description: the Fuji X-E2 vs the Sony A7R - An unfair comparison? Rating: 3.5 Reviewer: LAMPSOLS ItemReviewed: the Fuji X-E2 vs the Sony A7R - An unfair comparison?

Winter birds with the Sony A7r with 135mm Leica APO-Telyt lens

The temperature was 10° when I left the house early this morning to run some tests on the Sony A7r camera with Leica lenses. A light snow was still falling and I headed over to Union Square Park. There I found numerous birds in the low trees searching for food. Their feathers were all puffed up to keep them warm. It also made them look like feather balls with a small heads. They were perched on branches deep within the smaller trees, but the white snow and sky helped to outline them.

I had the Leica 135mm APO-Teleyt-M mounted on the Sony A7r via a Metabones adapter.  The maximum aperture of the APO-Telyt-M is f/3.4, which I selected to give me the shallowest depth of field that would isolate the birds sharply against the out-of-focus tree branches. With the Leica lens this is a manual focus situation, of course, and I relied on the focus peaking feature of the A7r to outline the birds in red when they snapped into focus.

Here are a few samples, all shot manual focus with a wide open lens:

A House Sparrow, one of the more common birds in the city.
A White-Throated Sparrow looking like a little fur ball. 
I actually like the shots best when there are a lot of branches so the bird blends into them, as this puffed-up White-Throated Sparrow did, even with his color.

If you are planning on purchasing this camera or lens, you can help support this site at no extra cost to you by purchasing from one of our affiliate sellers listed below and thanks for your support :

-  Sony a7R Camera can be ordered from:  Amazon
-  Leica 135mm f/3.4 APO-Telyt lens can be ordered from:  Amazon

Free Shipping in US & Low Price On Amazon. For anyone looking for this model??

Description: Winter birds with the Sony A7r with 135mm Leica APO-Telyt lens Rating: 3.5 Reviewer: LAMPSOLS ItemReviewed: Winter birds with the Sony A7r with 135mm Leica APO-Telyt lens

Sony Cyber-shot full frame DSC-RX1 camera a hands on review

Sony Cyber-shot full frame DSC-RX1camera
a hands on review
Many of my friends in the photo industry have been telling me I would love this camera ever since it was announced. Although it is not a camera type I would normally use, I decided to give it a test drive to see what all the excitement is about.

This is a very unusual camera. It is a very small - in fact, the smallest - full frame camera coupled with a single superb Zeiss Sonnar 35mm f/2 lens. A package such as this is aimed at producing extremely high image quality, but the scale and limitations of the design raise questions of practicality of use. For this reason, there are two aspects of this review. The first part looks at the camera and lens combo in terms of its ability to deliver a quality image. The second part examines the camera-lens combo in practical terms of usage. In other words, does it work well as a system, and how would it fit into a typical workflow.

The Sony RX1 is shown in the foreground, while its smaller sibling, the RX100, is tucked in a jeans pocket behind it. By its very nature as a full frame camera, the RX1 requires a large lens and, even though it has a small body, is not going to fit easily into a pocket for carrying.
First, in terms of image results the camera is superb, ranking just below the current best of breed full frame cameras, the Nikon D800 and Nikon D600 series. Considering Sony's past relationship of supplying sensors to high end Nikon cameras, this is to be expected. When you couple such excellent sensor technology with one of the most legendary optical systems in the world, a Zeiss Sonnar lens, good things are bound to happen, and in this case they do. 

My brick-wall tests show an over all sharpness that extends even into the corners at wide open apertures. Full open at f/2 there is only a slight trace of corner softness, which rapidly dissipates as the lens is stopped down, and practically disappears at f/2.8 and beyond. I doubt anyone would find this degree of corner softness objectionable. In addition, there is practically no vignetting and only slight barrel distortion present at any aperture.
The following images illustrate the resolution capabilities of this camera and lens. You can download the full res version of these brick wall tests below to check the results for yourself.

Brick wall test. While no one runs around shooting brick walls as a matter of course, a test such as this does illustrate the relationship of center to corner resolution in a way that can relate to more practical uses.


Chromatic aberration was another matter. I found excessive amounts of color fringing along the edges of  typical shots of outdoor tree settings, such as the one below. Fortunately, this involved a simple lens correction in Photoshop, but this assumes you shoot in RAW and post-process images. With a high end camera such as this, I suspect most photographers would include post-processing as part of their workflow.


Color fringing is quite apparent in this type of image with high contrast and an overly bright background. To be fair, most cameras would have trouble with a situation such as this. I did, however, find the RX1 fringing to be more excessive. Click here to download a hi res version of this photo.

Noise levels at high ISO's were very good, as is the case with most of the high end, large sensor cameras coming onto the market now. What I term the noise threshold, that level after which noise becomes unacceptably excessive unless dealt with in post processing, peaks around ISO 2000. Below are some high ISO sample images to download.

ISO 800. Click here to download hi res version.

ISO 1600. Click here to download hi res version.

ISO 3200. Click here to download hi res version.

ISO 6400. Click here to download hi res version.

 Camera overview:

After selling off my Fuji X100 I pretty much swore off one lens cameras. I just don't see the need for them anymore with so many other quality options becoming available. As you might expect, with that attitude I have a prejudice coming into this review. 

The RX1 is something of a tour de force, almost as if Sony set out to create the smallest full frame camera just so it could make the claim and garner the press play from it. At $2800 this is a very expensive camera, as you might expect from something containing such a large high end sensor and quality optics. Plus, if you are a serious user, you would probably want to add either the electronic or optical viewfinder to it for an additional $450-600, putting the entire combo around $3300.  And don't forget to add several spare batteries to the package. You are going to need them. Battery drain on the RX1 is very high, probably due to its constant reliance on large live view.

All this begs the question: Is it worth the price. If it's quality you want, for that price you could buy a Nikon D600 and a great lens or two and be better off. If its small size and convenience you want, a Fuji X series with interchangeable lenses comes in at half the price.

Optional electronic and optical finders are an available accessory. I think most users would want one or the other, although they do tend to bulk up the overall package.
A camera of this caliber and sophistication is going to make an external viewfinder more than an optional accessory. I preferred the optical finder. It is much faster to use, and with only one fixed lens is all you really need. Electronic finders are inherently slow, although I found the Sony version to be much more responsive than most.  A hybrid finder, such as that on the Fuji X-Pro1 represents the best of both worlds.

The menu system looks similar to the Sony DSC-RX100. It is convenient and easy to use.

Full menu

Quick change menu
I personally found the camera body to be smaller than it needs to be, especially relative to its lens. It has what I call pregnant guppy syndrome, where the over-sized belly lens is too big for the tiny body, something that typically occurs when you try to downsize a full frame camera but cannot downsize the optics proportionately. Small as it is, the overall camera-lens-finder package is much too large to fit comfortably in a pocket. So you are going to have to wear it like a regular sized model. That being the case, adding an extra inch to the body, and incorporating a built-in viewfinder would have made this a much more practical package. In fact, adding interchangeable lenses into the mix would even have given the full frame Leica M some stiff competition.

The reason I find sharpness in the corners to be important is in landscape photos such as this. Focus was placed in the foreground of this image, and both foreground corners contain sharp detail. Click here to download a hi res version.

This close-up shot was taken at f/16 for maximum detail. Click here to download a hi res version.
Click here to download a hi res version of this image.
Even though the sensor sizes are not the same, I found myself constantly comparing this camera to the Fuji X cameras, the X100s, XE1, and X-Pro1, and wishing the RX1 was more like the Fuji in terms of handling . In terms of image quality, the RX1 with its full frame sensor is going to win hands down. But for convenience and professional features the Fuji X models are far more practical, and for most typical image uses the results are going to look the same. It is only when taking the image to super-size that you will notice a difference. And if it's Zeiss lens quality you want, the new Zeiss Touit lenses are available with full auto control on the Fuji XE1 and XPro-1.

The RX1 weighs only 1.06lb (460g), is 4.5"(11.4cm) wide, 2.6"(6.6cm) high, and 2.8"(7.1) deep with the lens.  By comparison a Fuji XE1 with similar lens comes in at only 14.67oz (416g), is 5.1"(129cm) long, 2.9"(74.9cm) high, and 3.1"(78.9cm) deep with an 18mm lens attached. In terms of size that is not too different, especially considering the added features the XE1 adds to the mix.

The Sony RX1, RX100, and Fuji X-Pro1. I like the RX100 for its tiny size and quality. It is a camera I can always have with me. I like the Fuji because of its professional build and quality results. I use it a lot when I want to up my game and don't mind carrying something on my shoulder. The RX1 fits somewhere in between, being neither here not there -- too big for a pocket camera, and too small to have the added convenience of built-in finder and interchangeable lenses.

The specs and price of this camera puts it into the pro leagues. So I expect it to perform up there with the best. This is a situation I was shooting with a Nikon D800 of a model in my studio. I substituted the RX1 to see how it would compare. Focus was quirky and slow because it had to be done in live view. Nonetheless, the resulting image was definitely of professional quality. Of course this comparison could only work where a 35mm lens could be used.
The lens has a ring to move it into close-up mode. This is not really a macro feature. It doesn't get that close, and at 35mm getting too close raises other problems of perspective. What it does do is act as a focus limiter so the camera doesn't hunt for focus when shooting up close.
This is about as close as this lens can go. Because it is a 35mm lens it causes a rounding distortion effect on the subject.
The pop-up flash is similar to that on the RX100, but does not seem to have the same flexibility for bending it to achieve bounce flash lighting.
The red button turns on the video record mode, something I did inadvertently way too many times by hitting it accidentally. The over/under exposure dial is positioned above it, similarly positioned as on the Fuji X-Pro1 but not nearly as susceptible to being turned accidentally.
The RX1 has two crop modes available, 3:2 and 16:9. It does not have the square crop of the RX100. Once I discovered the 16:9 crop mode, the RX1 became more useful for me as a dedicated panorama camera. Of course all this does is crop the image so you do lose megapixels. Nonetheless, 16:9 still gives an acceptable 20mp image -- really nice for large panorama prints.  The photos below were shot in the 16:9 panorama mode.
 
Once I discovered the 16:9 crop mode, I began seeing differently with the camera and ended up using it almost exclusively for taking panorama photos.


Conclusion:

If you are willing to live with a single, fixed lens camera -- something I no longer care to do -- then the Sony RX1 is best of breed in terms of image quality, and ranks right up there with the best full frame cameras available today.

The value of having such a small bodied camera producing such stellar results is negated by the large lens and inclusion of an accessory viewfinder.  That, coupled with the extremely high price tag forces you to compare it to far more practical camera alternatives. For the price, you could buy a high end Nikon D600 or even D800. For half the price you could buy a Fuji Xe1 or X-Pro1. With all these alternatives you have the convenience of interchangeable lenses, and built-in viewfinder -- not to mention, they are far more convenient to use.


Perhaps Sony will expand this model in the future to include interchangeable lenses and built-in finder with an RX2 model. Better yet, I would like to see an intermediary model between the highly successful RX100 and RX1, perhaps an RX10 with APS sensor, smaller lenses, and all the popular built-in accessories. In other words, make it more like a Fuji X camera. There is a reason the Fuji X series is rapidly becoming a cult classic. Sony would do well to take some lessons from that model and produce a slightly larger camera with more practical features instead of going for the smallest sized body just to prove you can do it. The small size works perfectly for the pocketable RX100, but to my mind the small size of the RX1 prevents the camera from reaching its true, useful potential.


This is a "hands on" review and reflects my personal opinion on using the equipment. If you are a user of this item and see it differently, please feel free to post a comment. I would love to compare your opinion and see sample images that support your findings.  - TG

Description: Sony Cyber-shot full frame DSC-RX1 camera a hands on review Rating: 3.5 Reviewer: LAMPSOLS ItemReviewed: Sony Cyber-shot full frame DSC-RX1 camera a hands on review

Blog Archive